 Written by ContentPowered.com
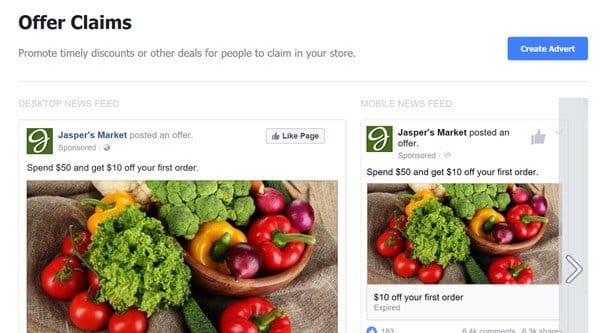
When you’re running a business and you want to drum up more interest in both your Facebook page and your physical location, you might be tempted to run a time-limited offer on Facebook. It’s a simple concept; users can visit your Facebook page, claim an offer, and use that offer in your store for some kind of unique item, discount, or service. You’re free to set the duration and the offer itself, but the system can be a little obtuse.
Step 1: Ask Users What They Want Most
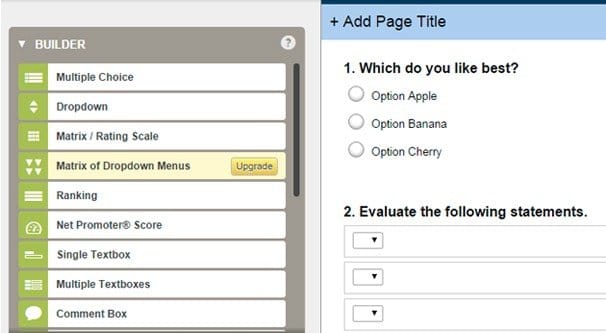
The first thing you should do when you’re setting up some kind of offer claim system on Facebook is ask users what they value out of your business. This will ensure that you’re providing the most valuable possible offer, which means as many people as possible will claim it and come into your store to redeem it, which means more visits and more sales.
For example, you can post organically – or through a page post ad targeting your audience alone – and ask what the like. It’s generally a good idea to post a handful of options for the user to pick from, otherwise many people will post off the wall or nonsensical answers (a $1,000 gift card!) or won’t post at all out of indecision. Giving them options gives them a fixed choice and makes them more likely to respond. You can also pose the question in the form of a survey (try SurveyMonkey) to your email list and other contact methods if you want.
If you run a day spa, for example, you could offer skin treatments, seasonal packages, hair styling, special event planning, and other such options. Various services, treatments, and products you offer can be chosen individually at a gift card level of service.
Once you’ve run this post, tally up the answers. One of three things will happen.
- One option is the clear winner, with the majority of the votes. In this case, you can easily offer that item as an offer to get people into your location, where you can sell them on other products and services, or hook them on treatments and get them to come back for repeat business.
- Two options divide up the popular vote. In this case, it’s generally a good idea to run two offer claims about a month apart, in different promotions. When you have two front-runners, each one will perform a little less well than if you had one single winner, but combined they should bring in more people than if you only have one offer.
- You have no clear winner. In this case, I like to recommend that you provide a gift card or general discount as an offer instead. Since users can’t agree on what they want more, either you have no demand for anything, or demand is equally spread out. A gift card or store-wide discount gets as many people as possible in the door to get whatever it is they want.
You can also skew the results in your favor, so long as they’re hidden from the public. For example, if you’re a small retail store and you know you have a surplus of a particular brand of cereal for one reason or another, you can set up an offer for users to claim that gets them a discount on all cereal items from that brand. This will get people into your store to claim those offers and will help sell off that surplus before the sell-by date passes and you have to discard it.
Step 2: Plan Your Campaign
Once you know what you’re going to offer, you have to figure out the details. How much value are you going to offer? For example, if you have a spa with a dozen different ala carte options, are you going to give users free reign or are you limiting them to two options per visitor? Are you giving them a $10 value, or does the specific value not matter? Are you giving everything in the store – or everything in certain categories – a 15% discount?

You should also figure out the dates you want the offer to be available, or if you want it to be a quantity-limited offer instead. I generally prefer a date range, because it’s easy to go wrong with quantity. If you have 500 interested people and offer 400 items, 100 people are going to be disappointed. This will happen! Remember that only a fraction of the interested people following your page will actually respond to your poll from step one. You might run a poll, get 100 responses, figure that means you can offer 150 items and have enough for everyone, and then run out in a day because 400 people were actually interested.
Date ranges can also determine the theme of an offer. There’s pretty much always a holiday of some kind coming up, and you can use it as an excuse to run your offer. Easter savings! It’s Finally Summer! Beach Body Prep! Autumn Closeout! Christmas sales! There’s seriously something just about every week, if you look hard enough.
Step 3: Determine the Type of Offer
Facebook’s offer system gives you three options for offers users can claim.
- Physical Only. These offers present the user with a coupon that they need to show to someone in your store in order to redeem. It will generally have a number, a barcode, or even just be a unique coupon you need to see in order to redeem it. You’ll have to teach your cashiers how to accept it, depending on how it works. There are all sorts of ways to do that, from a generic coupon you can scan that you trigger when the user shows you the coupon from the offer, to a barcode system you set up for the offer purpose. Users can either present this coupon on their phone at the time of purchase, or they can print out the coupon and bring in the paper copy.
- Online Only. These offers typically include a coupon code of some kind that is generated for the user when they claim the offer. This could be a referral code for your website, or it could be a coupon they put in at the end of checkout, or something in between. It’s not valid in your store; it only works if you’re sending people to your website to make their purchase.
- Combo. This is both of the above; an offer that can be redeemed either in store or online in your shop, either way.
If you only have a web store, obviously you can only use the second one. If you don’t have a web store, you can only use the first one. If you have both, you need to decide which one you want to send people to, or if you don’t care and just want more sales.
If you’re wondering why you would specify one and not the other when you have both, think about it in terms of low sales. An offer that is only valid in person will get more people into your physical location, where they can be exposed to additional marketing and upsells. If your storefront is struggling and you need more people in, or you have a surplus you need to sell off, this can be a way to do it.
Conversely, it can be a good idea to have an online-only offer if you’re, say, opening up a new web store, testing out new layouts or marketing, or trying to get more people to shop without crowding a small physical location. Logistical issues, inventory issues, awareness issues; offer claims can be used to solve or alleviate all of them.
Step 4: Set Up The Offer
Now comes the most important part; actually setting up the offer. See, on Facebook, these fancy offer claims are actually advertisements. They use the Facebook ads system. That means your Facebook page must be able to access ads, and you can’t have been banned from using the ads system in the past.
Note: Facebook is currently working on changing how the offer system works, making it a type of ad across objectives rather than an objective in and of itself. If the below steps don’t work, try creating another type of ad – probably “advertise your business” – and see if offers are an option to choose.
There are two ways (outside of the above) that you can use to create an offer. One is through your page directly, and the other is using either the Business Manager or the Power Editor.
Using the page directly:
- At the top of your page, when you go to compose a post, you should see an array of boxes of images, each with an objective, like “advertise your business” or “get messages”. Click the “create an offer” option.
- Click to choose whether you want an online, store-only, or cross-platform offer.
- Enter the website URL where the offer can be redeemed, if using an online offer.
- Choose the type of offer. It can be a percentage off, an amount off, a BOGO, or a free item claim.
- Fill out the specific information about the offer. This will include the title, description, image, discount code, number of available offers, terms and conditions, and other information. Each type of offer, as well as whether it’s online or not, will change the information you need to add in. You will see a preview to the right of what the post will look like, and you can click a tab on that side to see the difference between the desktop post and the mobile post, to make sure it looks good on both types of device.
- Click to create your offer or to schedule your offer, if you don’t want it to start immediately.
- If you want, click to boost the post, injecting money to get it more exposure. I generally recommend targeting just your existing followers; you never know if a random non-follower will want to claim an offer, but you know your followers are interested enough to do so, so you get more mileage for your money.
Both the ads manager and the Power Editor work in roughly the same way, so the steps are combined.
Here’s how to set it up with the Power Editor.
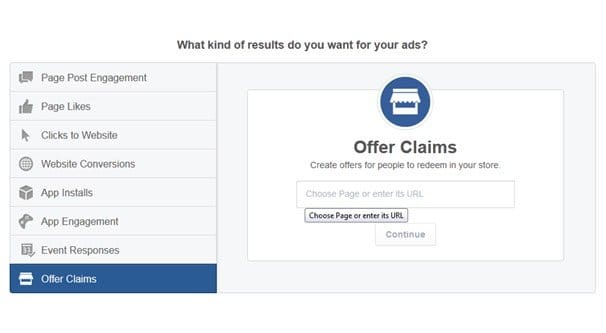
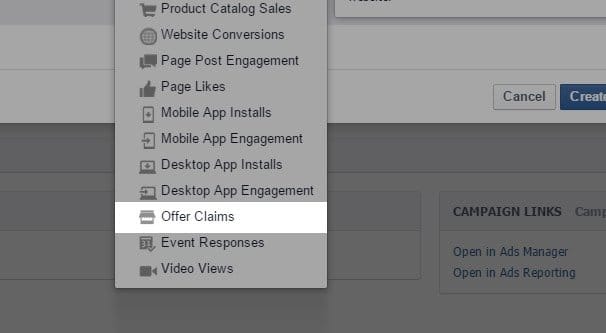
- Choose whether you want the traffic or conversions objective. For traffic, choose either to your website or to your messenger. For conversions, choose the website you want to send people to. You need the Facebook Conversion Pixel installed on your site.
- Under “create new ad set” find the offer section and toggle it on.
- Choose the page you want to create the offer, and click “create offer.”
- Fill out the details of your offer, including the type, whether it’s online, in-store, or both, and the details of the post itself. This is the same window as the above steps, just with a slightly different layout, and it has all of the same information you need to plug in. The difference is, since it’s starting as an ad, it already goes on to ad information.
- Fill out ad information, like your target audience, your budget, and your ad placements.
- Click to place the ad order and wait for Facebook to review it.
It’s interesting to me that the two types of offer are actually mechanically different, rather than different ways to access the same system. Offers posted on your page itself are free, but you have the option to promote them as you would any other organic post. Offers created through the Power Editor or the ads manager are ads by default and require payment.
Offers on Facebook now work for you, by the way. When a user claims an offer, it is saved in an offers section at the side of their page. They will also be notified directly through Facebook when the offer is about to expire, in case they haven’t taken action to claim it yet.
Need help configuring your offer? Do you have questions about using barcodes, limited claim offers, or other questions? Facebook’s FAQ on the matter is actually pretty good – shocking, I know – and you can find it here.