 Written by ContentPowered.com
If you’ve been getting into Facebook marketing, you’ve probably heard of the power editor. You might think you’re not enough of a power user to use it. You might think your campaigns are too small or too simple to make use of its features. You’d be wrong. Everyone can use the power editor, and easily.
Why Use the Power Editor
First of all, you should just take my word for it. The power editor is such a useful tool that it’s hard to go back to running campaigns without it. It only takes a little bit of getting used to. Of course, who am I to tell you what you should do? Here are some tangible reasons to use the Power Editor.
1: Feature Previews
The power editor is a Facebook-supported tool, so it has access to Facebook’s API in detailed ways. Some features are only usable from within the editor. Others were debuted to power editor users before they rolled out to the general public. For example: custom audiences, lookalike audiences, partner categories, conversion tracking, sponsored search results and domain sponsored stories all debuted to the power editor before other marketers could use them.
Sooner or later just about everything is available to normal users, but power editor users can get ahead of the game by learning and using new features before they publicly go live.
2: Ad Placement
Facebook limits where you can place ads, or at least your control over that ad placement, when you aren’t using the power editor. The Boost Post button, for example, only creates desktop news feed ads. Creating an ad through the ad manager creates a sidebar ad. What about mobile news feed or segmented ads? For those, you need to turn to the power editor.
3: Customized Bidding
Power Editor gives you a much wider range of options when it comes to bidding on your PPC ads. Boosting a post, for example, automatically assigns Facebook’s own Optimized CPM. With the power editor, you can create the same ad using manual configurations, CPC or normal CPM in addition to oCPM.
4: Bulk Creation
Power Editor allows you to create a single ad with ease, but it’s even easier to create more than one ad at the same time. You can create one campaign with a dozen variations of each ad within it, and it’s a huge pain in the ass with the manual ad creation tool. Meanwhile, with the power editor, it’s just a few clicks. You can even save the audience to use the same targeting for each, rather than having to set options every time.
Using the Power Editor
There’s one major drawback to the Power Editor, and that’s the fact that it’s designed for Google Chrome and only works with that browser. Some versions of Firefox are sufficiently similar that it will mostly work, but it’s not supported and is prone to breaking. Meanwhile, it just plain won’t work in IE. So you’re going to need to run Chrome at the least.
It’s also not the most user friendly piece of software ever written. If you don’t know at least the basics of creating and managing ad campaigns, it’s going to look like the cockpit of a jumbo jet; full of options with little explanation beyond terms you don’t quite understand.
Thankfully, it’s not all that hard to understand once you get into it.
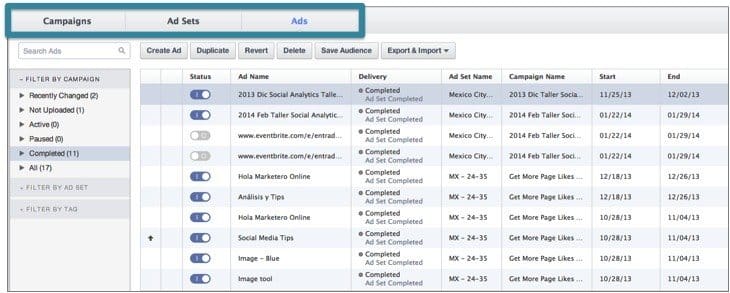
First, you need to be aware of the work areas in the power editor. The left pane is a set of filters for the data in your main workplace. You can quickly navigate between pieces of information, individual ads, ad sets and campaigns here.
The workspace is where all of the main action takes place, and allows you to edit any of the information you filtered for in the left pane. Meanwhile, across the top of the screen, the tabs for campaigns, ad sets and ads allow you to go through individual sets of ads.
Creating a campaign is easy. There’s a big “create campaign” button in the top left. Click it, name your campaign, and choose a buying type. You can also choose your ad objective here.
Within your campaign, you create as many ad sets as you need. An ad set is a group of related ads that you can organize in much the same way you used to organize campaigns. For example, if you’re split-testing five variations on a single ad, all of those ads can go in one ad set, while another base ad with its variations go in a different ad set. Just create the set and name it within a campaign.
Creating individual ads within an ad set is easy. Choose the campaign, choose the set, and name the ad. Specify the ad details here, including the copy, the image and the title. Don’t forget to create a tracking URL using Google’s URL builder, or Facebook’s tracking pixel.
Once all of your copy is done, you go on to ad targeting. This is where things really open up compared to, say, the Boost Post button. You have virtually infinite combinations of interests, demographics, location and language targeting options. Save your audience when you’re done, so you can use it for future ads.
For pricing, you choose between CPC, CPM, or Facebook’s oCPM. Their oCPM is actually quite good, but you don’t have to use it if you want more control over where your ad spend is going.
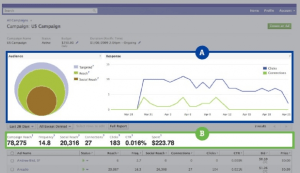
Of course, this is all just one part of the power editor. You also have all of the information tracking available through its interface, with all of the additional features that implies. Rather than being forced to use the limited Insights panels, you can customize your views here. You can also create lookalike audiences for future use. Really, this piece would run on for a million words if I detailed every feature; just look at Kissmetrics for a more detailed rundown. When you’re convinced, you can download the Power Editor directly from this page.

