 Written by ContentPowered.com
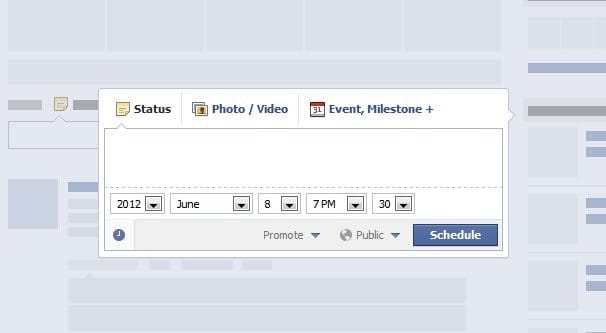
A drip campaign is a specific type of marketing used by virtually every business of a sufficient size. You don’t notice, because from the outside perspective, it’s seamless and more or less just like normal web marketing.
The idea is simple. First, you need to come up with your marketing campaign. This is mostly used for single large events, like the release of a new product. You have a product, so you have a list of important information about that product you want to share. Rather than give it all out at once, you decide to drip feed it to your followers and build a hype campaign.
You might start off by sharing a silhouette of the product. You can follow it up with a date for release. You can start sharing individual details, like the name, the color options, and technical details. Save the most exciting revelations for near the end, so people are hyped up guessing and trying to work it all out.
This sort of campaign is no different wherever you choose to run it. It can be done via blog posts, it can be done with a microsite dedicated to the new product launch, or it can be done entirely on social media. Most often, it’s done using all of them.
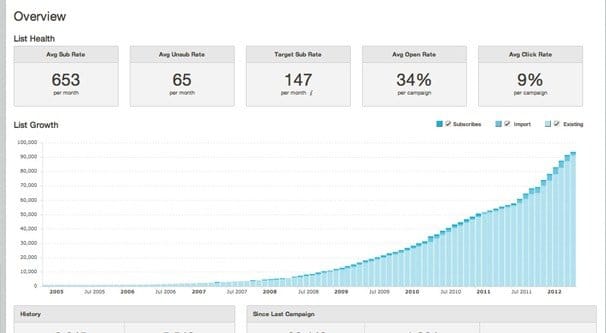
Drip marketing was originally designed for email mailing lists. You could send out a set of special emails to new subscribers, drip-feeding them into the flow with the rest of your mailing list. You can send out drip-style messages to your whole mailing list for a new promotion.
Thankfully, social media was practically designed for this kind of campaign. You have a targeted audience composed of only the people most interested in your products to begin with. You have a tailor-made means of sharing small bites of information, since most social networks prefer shorter updates. You have built-in ads systems to help promote the campaign. Most importantly, you have post scheduling, so you can set the entire campaign up before you even begin.
Unfortunately, this is also where a lot of leaks happen. Many times, the person setting up the campaign accidentally creates a post and publishes it rather than schedules it. Even if it’s taken down almost immediately, some people will see it, and chances are someone will have saved it or left it open to look at later. Such a leak can ruin an entire drip campaign, and it’s a little embarrassing for the company’s marketing to be thrown off so much. Still, the show must go on, and you have to adapt and try again.
So how do you set up a drip campaign properly? I’ve put together a process you can follow.
Step 1: Determine What Information You’re Dripping
The first thing you need to do is draw back and take a look at the product you’re promoting with your drip campaign. What is it? What features does it have? Break it down into its component parts – thematically, not literally – and make it as granular as possible. You need enough tidbits of information to keep people interested, but they need to have enough substance that it doesn’t feel like you’re just scraping at straws.
One example of this is the upcoming Pokemon game launch. Pokemon is full of discrete pieces of information they can release to hype up players. They can release information on new monsters, the new starters, the game’s antagonists, the thematic legendaries, as well as mechanics and quality of life features. There’s plenty there.
The number of pieces of information you can come up with to share will determine two things; how many individual posts you will need to make, and how many weeks prior to launch you can start building your campaign.
Step 2: Determine What Platforms You’re Using
The primary platforms you should be using are your website, your mailing list, your Facebook page, and your Twitter feed. You can also use an Instagram, a Google+, or any other social network you want.
For every update you have to post, determine which platforms it should be posted on.
- Pretty much every update should be posted to Facebook. The exception is if it’s an image and you want to push people to visit your Instagram, in which case you can leave it off of your Facebook.
- If the content can be portrayed in an extremely short post or a Vine-length video, post it on Twitter. Otherwise, Twitter should be used as a “did you see the news? <link>” manner.
- Your mailing list should get a weekly digest of updates, but not necessarily a message every time you post, because then you could be spamming your subscribers and drive them away.
- Every update should be posted on your website and expanded upon in a way that brings broader context but does not spoil future updates.
Figure out where each fits in your role for each piece of information. Some you can use to draw in people to certain profiles, while others will be best used for broad appeal and attraction.
Step 3: Determine the Release Date for the Product
This step is, quite frankly, a gimme. If you’re working marketing for a product and you don’t know when it’s going to be released, you have a lot of work to do.
The reason you need to know when the product will be released for the purposes of the drip campaign is to know the target date for when all of your hype information should be out and in the world. It’s the finish line, so to speak.
Now, you won’t want to wait to release some details the day of. At that point, people will likely have made up their mind, and holding out on them will frustrate them. I prefer to have the full informational release, including price, released about a week before the product release date. This gives people time to look it over, time to preorder, and time to convince others how great the product is.
Step 4: Determine a Content Schedule
Now you have all of the vital information you need to start putting together a calendar. How many pieces of information do you have that need posts? How many posts per week do you want to post? I recommend 2-3. Go heavier when the posts include smaller details, but go lighter when there’s a larger piece of information coming.

Now extrapolate backward. Set up a calendar with the release date as the end point, and organize your informational nuggets stretching back however many weeks you need to hype it all. If you find the hype campaign is looking to be too long, merge a few pieces of information. Remember, you’re teasing and building up anticipation, but if you take too long it will wear your followers out.
Make sure you firm up this schedule as soon as possible, so you can start working on content. The sooner you have your content scheduled and ready to go, the more time you have to set up to monitor bugs.
Step 5: Create Content Locally – Posts, Images, and Other Media
By “locally” here I mean on a computer that is not tied to any of your social media content. Write your Facebook posts, write your Tweets, come up with your hashtags. Create your images and your videos. Take photos of the product. Write your blog posts and landing pages. Test a preorder form locally.
The key here is to avoid doing any of this on a live site. You don’t want to make a mistake and derail the hype train by accidentally posting a spoiler for the whole thing. That will make you reorganize your calendar and will ruin some of the surprise.
It’s particularly important to avoid posting anything on your website, even internally. There are scrapers that look for changes, errant links, feeds and logs, and data miners may scrape your content and spoil the whole thing before you get a chance to post a word.
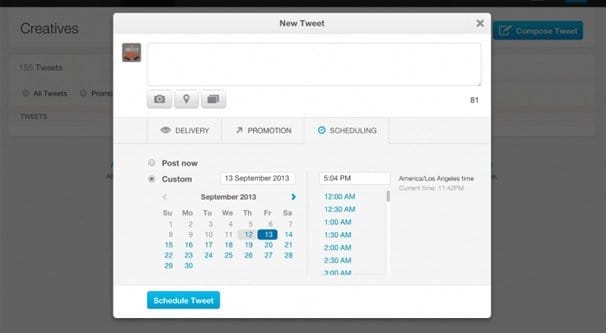
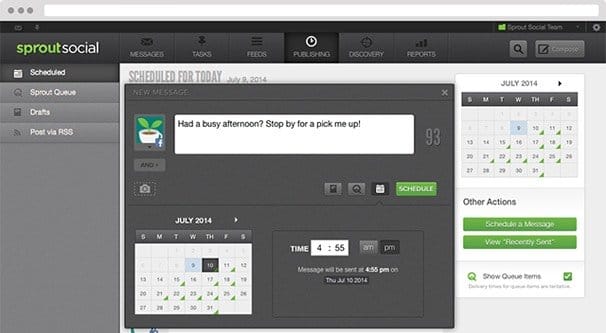
Step 6: Pick a Scheduling Manager and Schedule Posts
It doesn’t really matter what system you use to schedule the posts to your site, so long as it meets the basic requirements. It needs to handle the social networks you use and the content you intend to post. For example, some managers don’t handle video, so if you’re using video on Vine or Facebook, you need to find a different platform. It also needs to be whitelabel for your posting; some social managers add a “posted by” line and can throw off your mojo.
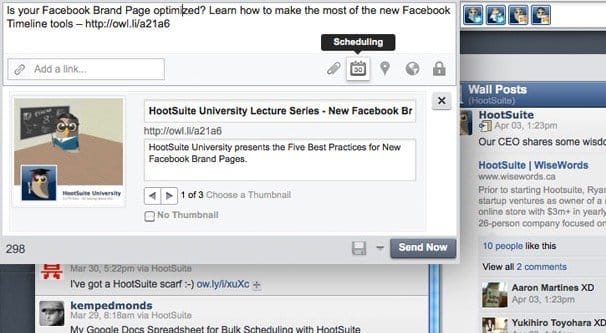
The main reason you want a manager that will handle every site equally is that you don’t want to have to juggle between programs when scheduling. A lot of robust schedulers will allow you to basically check boxes to choose which networks get a post, with some customizations to allow for format restrictions.
Once you have a manager set up, start to schedule your posts. I recommend doing this a week or so in advance of when the first post is going to go up. The closer you do it, the better off you’ll be with regards to mistakes and spoilers.
I’m assuming, of course, that you’ve done studies with your audience to determine peak usage hours. If you haven’t, look up how to study that data from your audience so you know what days and times of day you should be scheduling.
Step 7: Engage With Users and Tease More
Once your campaign is live, you need to remember that automated posting is not the final solution to your problems. You will need to actually maintain a presence and engage with your users who discuss the product in your feeds. If they ask questions, consult with your scheduled posts. If it’s something you should save for later, be coy about it. If it’s a detail or legitimate question you can answer to guarantee a sale, go ahead and answer it.
Why schedule at all, if you’re going to be there at the time? It means you don’t have to worry about making the right post at the right time. It leaves less room for human error. The fewer possible mistakes you can make, the better off you’ll be.
Step 8: Push a Mailing List for Updates
At every step of the way, I recommend pushing a specific mailing list, a sub-list of your main list, for updates. When you post to your social profiles, you can send an email about it as well. This helps you gather up an audience of the most interested potential buyers, which will be important come launch. These are the people most likely to preorder, most likely to order on the release day, and most likely to be engaged with your brand on an ongoing basis.
Don’t just discard this list once the drip campaign is done. Merge it – removing duplicates – with your primary mailing list. They are, after all, still important customers or potential customers.
Step 9: Record and Analyze Data to Improve Future Campaigns
When the campaign is all said and done, harvest all the data you can. Look at post times, look at engagement rates, look at mistakes made along the way. Look at the hype, the criticism, the highs and lows. All of this is information that should be filed away so that you can reference it when you get around to another hype campaign down the line. Iterate and improve, and you’re sure to grow.
What about other kinds of drip campaigns? I know I really only covered a launch, but most of the steps are going to be similar. There’s no real user onboarding with social media the way there is with email, so you don’t have to worry about that. Just figure out what you’re promoting via drip, set up the drip, schedule it all, and let it run.