 Written by ContentPowered.com
Canva is one of the newer, more innovative tools available for use today. It’s a great resource to create unique images for your social media sites, including Facebook and Twitter. It helps streamline the image creation process, so you don’t need to spend quite so much time looking for public domain images and piecing them together in a symbolic manner.
Step 1: Join Canva
Obviously, the first step is to join the program. It’s not a stand-alone app to download, like Photoshop. You need to go to www.canva.com and register for the app. It’s free and easy, either using an email and password you set yourself, or a Facebook login. You don’t even need to waste time going to confirm your email, if you go that route.
For a while, Canva was in a closed beta, requiring a few more hoops to get into the system. Now, you don’t need to hand off your bribe to the Canva gatekeepers; you can just hop right in.
Step 2: Complete the Beginner’s Challenge
Canva has a cute basic tutorial to introduce you to the basic concepts of the site. You’ll be asked to select graphics and put them into pre-prepared images to complete them. You don’t actually need to complete it, of course; just scroll down and click “I’m Finished” to move on.
When you do, you’ll be brought to the actual Canva screen that you do most of your work from.
Step 3: Pick a Design Template
There are several design templates to choose. Some are designed for social media use, while others have other purposes.
- Album/Podcast Cover – This is a new offering, and it’s basically a simple square template designed to be optimized for digital music covers, like what you’d find on iTunes.
- Social Media – This template is a general square social media post. When you want an image to accompany a post where the site doesn’t use landscape orientation, you can use this.
- Presentation – This is a general template for a rectangular slide, like what you’d post on Slideshare.
- Poster – This is a general template for a vertically rectangular image, like making a digital flyer or poster.
- Facebook Cover – Obviously, a cover photo for Facebook.
- Facebook Post – A slightly rectangular image set to mimic the size of the image that displays when you post an image to Facebook.
- Blog Graphic – A taller vertical template designed to sit next to text on a blog.
- Document A4 – A template designed to fit on an a$ size piece of paper.
- Card – Pretend you work for Hallmark.
- Twitter Post – A nice rectangular image to accompany a tweet.
- Invitation – An invitation template, typically mostly text.
- Business Card – Design a business card!
- Twitter Header – A large rectangular image sized to fit above your Twitter feed.
- Pinterest – The tall vertical image perfect for a Pinterest pin.
- Real Estate Flyer – Self-explanatory.
- Google+ Cover – Like the Facebook and Twitter covers, a template for the top of Google+.
- Kindle Cover – A cover for something you self-publish on Amazon Kindle Direct.
- Photo Collage – A photo collage template.
- Facebook Ad – Sized perfectly for the rectangular news feed ad.
- Facebook App – Make a small custom app button.
- Custom – You can create your own templates and store them for future or repeat use.
Step 4: Make a Design
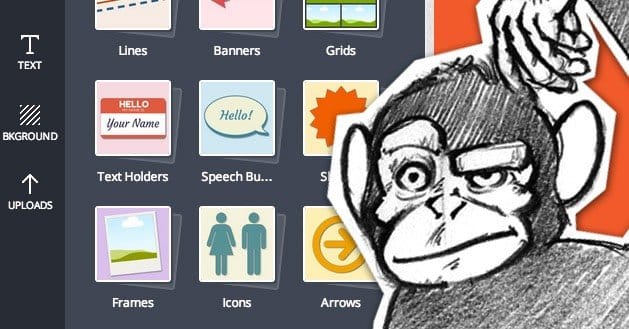
Canva has dozens of pre-created designs you can pick and customize in each category, or you can make one of your own. On the left sidebar, you can see various buttons. The search button allows you to search through Canva’s database of images for something that fits your needs.
The Layouts button gives you the pregenerated layouts to pick and customize. The Text and Background buttons allow you to create text and drag in background images, respectively. The Uploads option allows you to upload images from your computer, or link with Facebook and pull in images you’ve stored on the site before.
Be aware that a lot of images, backgrounds and licensed elements inside Canva will cost you a small fee to use. Want to use a picture of a cow in a field? Chances are it’s a flat $1 to do so. You’re limited to a very small selection if you’re sticking to free images.
You can change various attributes for various elements. Make something partially transparent, make something rotated, layer bits over top one another, crop them, position them, change their colors, lay over filters; it’s all available. Canva is surprisingly deep, for a freemium service.
Step 5: Link and Publish

Once you have an image you’re satisfied with, you can click the link and publish option at the top of your screen. It will give you a link you can use if you wanted to directly link a few people to the image. If you wanted to publish it instead, you can download the image in a web format or download it as a PDF for printing.
If you’re collaborating with a team or presenting ideas to a graphic designer, you should use the link option. You can click the checkbox to allow anyone with the link to edit the resulting image, for a collaborative team experience.
Step 6: Pay
If you’re using a design made up of free elements, you’re good to go. Canva will automatically generate you the image, pdf or link for use, completely free.
If you do end up using any of the Canva premium elements – which you probably will, if you want something better than some text on a basic color background – you’ll need to input payment information. Each element is $1, so you won’t build an image around a background only to find out it’s $20. You can take and use the image for free, but it’s watermarked.
One quirk is that when you pay for an element on Canva, it’s available to you for 24 hours. You can use it in as many designs as you like for those 24 hours. Once that time is up, if you want to use it again, you’ll have to buy it again.


