 Written by ContentPowered.com
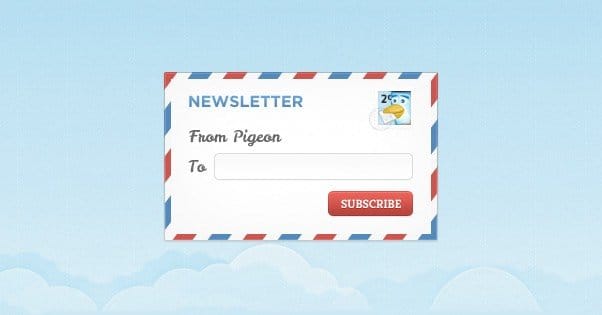
There are three ways you can add an email signup or opt-in to your Facebook page.
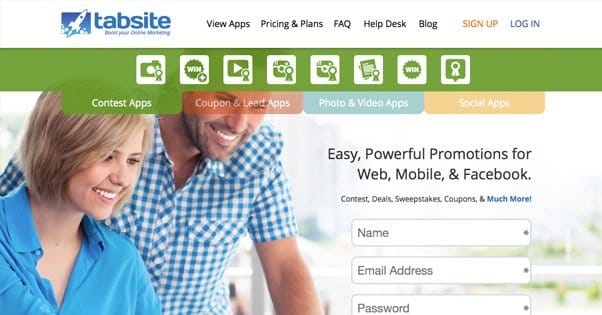
One is through organic posts; you create a landing page, you link to it, and you get people to click through to your site. The second is using the Facebook Page CTA button, which you can customize in your page administration section. The third is by using a tab app, either one you create yourself, one created by your email manager, or one you make through a third party tab site like Woobox or TabSite.
I’m going to give you the basic rundown for each.
Option 1: Organic Posting
Organic posting is the easiest, least technical, and potentially most effective of all of the options. That said, it can also be terribly ineffective, and it all depends on how you choose to implement it, your audience, and your reach.
The first thing you need to do is create a landing page with an email opt-in as your primary objective. This page will need to tell users about the virtues of your mailing list, what they get out of it, what problems it solves; you know, all the normal landing page copy. Some tips from that Copyblogger post include:
- Understand who you want to attracts and learn the way they think. Figure out what it is they want, and present your landing page in a way that convinces them that you have it. Don’t be afraid to use different landing pages for different audience segments or targeted groups.
- Make sure your entire landing page is focused on getting anyone who lands on it to sign up for your mailing list. It should be the only action a user can take that isn’t hitting Back or closing the window. No top bar navigation, no footer, no sidebar, no social sharing links, no outbound links in your copy.
- If you want to present links to content to back up claims you make, embed that content on the page. You can use hidden DIVs to make the content expand when a user clicks the link, rather than sending them off the page.
- Include social proof, but avoid including it in a way that can provide an exit for users. Testimonials, reviews, media mentions, client logos and raw subscriber numbers are good; links to Facebook and Twitter are not.
- Consider giving users an added incentive for signing up. It could be a temporary discount on your service, or a free whitepaper, or an ebook, or a seminar, podcast, or anything else. The point is two-fold; first, you want to encourage them to sign up. Second, you want them to open the initial message you send, to avoid their email client flagging your unopened messages as spam and filtering them.
- Ask for as little information as possible. Every single box in the form a user has to fill out is a roadblock, and it’s a place a user will decide they don’t actually want your freebie that much. At the absolute most basic level, all you need to ask for is their email address. You can optionally ask for their name, their business, and a whole lot of other information, but resist that temptation. If you absolutely want to get that information, test whether it drops your conversion rates before you run with it.
Once you have this landing page, you’re going to want to do some initial setup.
![]()
First, go to Facebook and get the code for the conversion tracking pixel. You can find the code here. This pixel is primarily used in paid advertising, which you will probably want to use in the future.
The purpose of the pixel is to filter and track the users who visit your page. When a user clicks on your link and reaches your landing page from Facebook, Facebook will track them. With the conversion pixel, they will be added to an audience of people who clicked. If they go on to convert, they will be removed from the list of people who clicked, and added to a list of people who converted.
This is useful for two reasons. First, it gives you an audience of people who converted, so you can reach them directly with ads for expanded products and services, in addition to the messaging you get through your mailing list. Second, it gives you an audience of people who were interested but who didn’t convert. You can use this for remarketing, to target them and get them to change their mind. Maybe you’re giving them a different incentive, maybe you’re just changing your ad copy; whatever the case, it’s a targeted audience full of interested people.
Where, exactly, does the conversion pixel go? This is the tricky part. When a user puts their email address into your form, you need to redirect them to a “thank you” page. That page is where the tracking pixel code goes. You need it run on a page that’s only visible to people who have successfully converted.
The next thing you should do is go to Google’s link creator and familiarize yourself with UTM parameters. UTM parameters are tracking code added to the end of a URL, and they give you the ability to track users reaching your landing page from different links. One set of parameters indicates people coming from one post, while a different set indicates a different post, and a third set indicates an ad, while a fourth might indicate a Twitter post.
None of this data shows up in Facebook Insights; instead, it’s all tied to Google Analytics and your website itself, where the landing page is hosted. Between the conversion pixel and UTM parameters, you’ll be able to track a ton of information about the people who convert.
Once all of this setup is complete, you’re finally able to go about the actual process of linking to your landing page. You can do this by posting organically with the link, as well as by running ads. Sidebar ads, mobile ads, news feed ads, boosted posts; they’re all good, but they all require some initial investment. They are PPC, after all. How you use and optimize these ads is up to you. I’ve written about it before, which you can find elsewhere on this blog.
Option 2: Facebook’s CTA Button
Six or so months ago, at the end of December, Facebook added a new feature to some pages on the site.
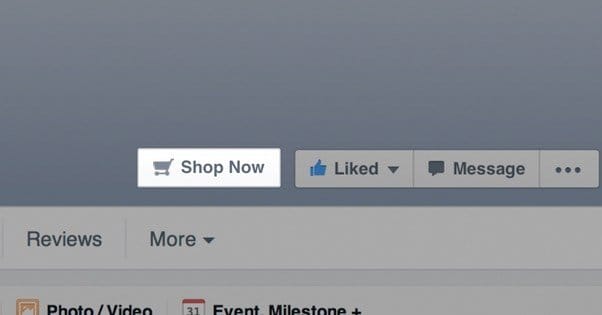
This feature is the CTA button, which appears in the bottom right corner of the cover photo, along with the “like”, “message” and “…” buttons for more options. It has since been rolled out to every business page on Facebook. The CTA button is customizable, and that’s what we’re going to do here.
The first thing you’ll want to do is, well, follow the steps I put forward in the first option. You’re going to need your own landing page for this one, because the CTA button is really nothing more than a slightly customized link to an off-site landing page at the top of your business page. So, do all of that stuff I mentioned about creating an optimized landing page, setting up conversion tracking, creating audiences and optimizing for your demographics.
There are seven options for the CTA button text and icon, but they all work about the same way. They’re all just a link to an off-side page. The only difference is how users see them, and thus how likely they are to click. If you’re trying to get people to sign up for your mailing list, you’re not going to want to use the “Watch video” CTA button, for example.
The seven possible options are “Book Now”, “Contact Us”, “Use App”, “Play Game”, “Shop Now”, “Sign Up”, and “Watch Video”. In general, the only one you’re going to want to use for an email opt-in form page is going to be “sign up” because the rest indicate actions that aren’t going to happen.
Now you’re ready to actually set the CTA button. Here’s the general process:
- Log in to Facebook and make sure you’re using it as your business page. If you’re not, you’ll need to click the little arrow in the top right of the page and use the drop-down to select your page out of the list. Make sure you’re an admin account for the page; you won’t be able to do this if you’re a moderator or any role lower.
- Next, navigate to your page itself. If you had to switch to your page account, you’ll already be there; congratulations! If not, you’ll have to find it. I know this can be confusing; I lose pages in my couch cushions all the time. Don’t worry, though, they’re easy to find.
- You’ll see one of two things in the spot a CTA should be. Either it will say “Create Call-To-Action” or it will have a call to action already there. If it says to create a call to action, click the button. If it has a call to action already in place, you will want to click the arrow in the corner of the CTA itself and click “edit call to action.” Both options will pop up the next box and allow you to proceed to the next step.
- In the create or edit call to action box, you will see a “choose a button” drop-down box, and two forms, one for Website and one for Mobile Website. Click the drop-down box and click the “sign up” CTA button. You could also use Contact Us if you really want, though I highly recommend testing which one works best before choosing to finalize your decision. You can, of course, change the button copy at any time without having to change the links attached. This makes said testing very easy.
- Next, put the URL of your landing page – you know, the one I had you create at the start of this step? – into the Website section. Now, whenever a user clicks on your CTA button, they will be taken to that landing page, where your copy does its job on selling them on your mailing list. I recommend using a unique UTM tracking link here, so you can track specifically the people who enter your landing page via this link as opposed to other links on Facebook.
- Next you can optionally set up different processes for mobile users. First is the mobile link beneath the website link. The mobile website should be a version of your landing page specifically designed for mobile users. If your landing page is responsive, you’re good to go. If not, I recommend making it responsive. It’s a huge benefit. Think of this website as the backup, for mobile users; desktop users will be taken to your landing page; mobile users can be directed to a different page if necessary.
- Once you click next, you will be presented with another box, with another drop-down. This one is labeled for iOS users. Here, you can choose whether to send iPhone and iPad users to your mobile website, or send them to a specific app. You will nee to have an app and have a deep link to it, if you’re going to use this option. You can also specify a backup website for just iOS users. When you click Next, you will be asked to set the same things for Android users.
- Once you’re done setting mobile device-specific options, you can click save changes to finish.
So, what is this about apps? Unlike the option I mentioned way back at the start, talking about tab apps, this is actually referencing mobile apps. You know, the kind of software you download from the Apple App Store or the Google Play Store, or even the Amazon App Marketplace.
If you want to know more about this option, you can click this link here to go to the relevant page in the Facebook Developers section. Be warned, however; it has a lot of code and technical language, so if you’re not well versed in apps and mobile development, most of it won’t make sense.
Option 3: Tab Apps
The third option is to create a tab app on Facebook. This is actually a very easy process, though it’s made a little more complicated by the reliance upon whichever mail manager you have and plan to use.
The simplest option is to use something like TabSite to create a custom tab that just displays an iFrame version of your existing landing page. This makes it a very basic version of the same sort of CTA you have in option 2. It’s not the most streamlined option, however, so I’m going to give you a better option.
This better option will follow the steps put forth by MailChimp. That said, I’ll also link some other services and their instructions below these steps.
- First off, this feature requires that you be a Manager in MailChimp or higher. You will also need to be an admin on your Facebook page. This tends to be important for team collaborators, where work tends to be delegated but permissions aren’t.
- Make sure your MailChimp and Facebook accounts are integrated. This is a very simple process, the steps for which you can find here. You won’t be able to manage Facebook through MailChimp if you don’t have this integration set.
- In MailChimp, click your name and click the Account section. This will take you to a new dashboard, where you will need to click the Integrations button along the top bar. Click Facebook.
- In the menu that appears, click the Page To Use drop-down and select your specific page from the options. If you only run one page, it will be the only option. If you’re an agency or you run multiple pages, make sure you’re picking the right one.
- Next, select a list to use. This will add users to an existing mailing list via the form. You need to select a list if you want to have an opt-in form. You may have to go back and create a new list if you want one that isn’t an option.
- Click Yes when asked if you want to use the signup form tab. This will create a tab app on Facebook, which can be customized later. This tab app will appear in your apps section in the left sidebar on your page. You can make it appear in the top bar beneath your cover photo as well.
- Under Form Theme, you will have to choose which of the themes you want for your opt-in form. You can use one of the options, or the theme you have set for your list elsewhere, if you’ve used this system in other locations.
- Set a name for your tab in the Tab Label box. Be aware that this is the name Facebook uses for your tab, so make sure it’s something attractive for users. Save all of the changes, then navigate to Facebook.
- Once on Facebook, you will see a new tab with a name, theme, and link to an opt-in form.
To customize this tab app, you’ll nee to access it from Facebook’s side of things. Go to Facebook and sign in as your page, then click Settings. Under the menu that appears, click Apps, find your MailChimp app, and click to edit settings. In the box that appears there, you can change your image and name for the tab. Make sure any image you use is properly sized for a Facebook tab app.
Want to do this with another mail program? Here are a few how-tos for other systems:
By following one or all of these options, you will have several routes for users to opt-in to your mailing list from Facebook. Now the real work begins; optimizing the traffic flow and engaging the users who sign up.
