 Written by ContentPowered.com
If you were to go back over the archive of this blog, you would find a lot of different posts written about various aspects of running Facebook ads. We talk about it in various levels of detail and for various lengths of time, but a lot of the advice is geared towards either running ad campaigns yourself, or knowing enough about how to do so that you feel comfortable talking about them when you outsource them.
I believe every small or mid-sized business should be aware of Facebook ads and should be capable of running a basic campaign. Maybe you won’t have as much immediate success as a professional who has been at it for a decade, but you also shouldn’t be fumbling around in the dark. I know how complex it is looking through all of the rules and guidelines and instructions for Facebook ads. I know how daunting it can be.
That’s why I decided to create this basic guide. Now, you won’t be making professional quality advertisements with this guide. I’m just giving you enough information to get something up that should, with a little luck, make you money. Consider it less of a gospel, and more of a proof of concept. Use this path to prove that you can succeed with Facebook ads, and learn more from there.
Some people will argue that you shouldn’t try to DIY your own Facebook ads. I think they have good points and bad. Yes, it’s a lot of work. Yes, professionals will do it better and faster than you will. However, it’s a good idea to at least know the basics of what’s going on, so you can fill in if necessary. The idea that you absolutely can’t DIY your ads is more willful ignorance than anything else.
Step 1: Determine Your Desired Objective
When I say “objective” I mean it in two different ways. The first way is your overall goal, in a business plan sense. You’re running some ads; what do you want them to do? Do you want to get more Facebook followers? Do you want people to download your app? Do you want to sell more products? Do you want to get people to RSVP for your upcoming event?
Remember that you can have many different ad campaigns running at the same time. In order to keep your ads organized, you need to understand the structure of ads. You have your overall ads account at the top, and within it are your ad campaigns. Each ad campaign should be a different objective. One might be promoting your holiday sales, one might be general brand building ads, one might be app-focused ads, and so forth.
Within each campaign you have ad sets. Ad sets are groups of similar ads, typically used for testing purposes. Each ad set, then, is a different base ad. You might have your holiday sales campaign, and within it, you’ll have an ad set for your news feed post promotion, a set for your sidebar ad, a set for a mobile ad, and so forth.
Within ad sets are individual ads. This is where you can test variations on individual ads and compare their efficiency. Create an ad, then copy the ad and change one thing about it. You might have four different variations on your promoted post, each with a different preview image or title.
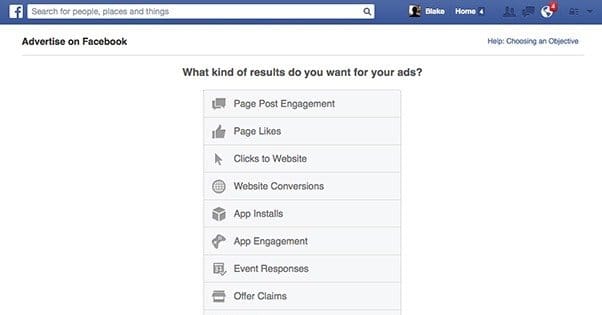
The second form of the word objective I mean is the actual Facebook Ad Objective. This is very important to set properly, because it determines how Facebook picks who should see your ad. Your targeting is important, and I’ll talk more about it later, but your objective determines the order in which the people in your audience are likely to be shown the ad.
For example, if you set an objective to “page likes,” your ads will be shown to people who have a track record of liking pages, as opposed to people who don’t. Those people might love to like pages, but never download apps; therefore if you’re going for app downloads, you would want to use the app download objective.
You can find the list of objectives and a bit more about them here, on this page in Facebook’s help center.
Step 2: Determine Your Ad Position
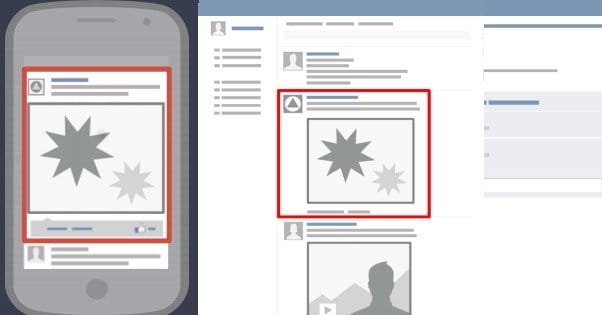
There are five possible placements for your ads on Facebook. Each of them has a different benefit to you, and should be used for a different type of ad. Some of them are more flexible, but generally your objective is going to determine where you want to put your ad to make it most effective. Here’s a rundown.
- Sidebar ads on the Facebook logged-in homepage. These ads have low click rates but decent visibility, and are best for brand building and general awareness. They’re also most subject to ad blindness and become lost in the right sidebar clutter.
- Sidebar ads on Facebook pages that aren’t the default homepage. These are more or less identical in every way to other sidebar ads, only they get less visibility because people don’t spend as much time on the pages where they’re shown. Consequently, they tend to be cheaper, making them the cheapest – but least effective – option.
- Mobile newsfeed ads. These are the most prominent ads on mobile devices and constitute basically everything displayed on Facebook on mobile. These are best for local ads, awareness, and anything other than sales. People generally don’t like to buy on a mobile device if possible; they’ll go to the desktop to do that, because it’s more secure.
- Mobile app ads. These are ads that display in apps, and generally are best used to promote other apps. They can be quite expensive depending on the competition. It’s difficult to successfully use them in a way that pulls people out of the app they’re using.
- News feed ads. These ads look and feel like organic posts and as such tend to have some of the highest click rates. However, they’re difficult to use for direct marketing, and instead work best when they lead to landing pages, blog posts, and other forms of brand-based content marketing.
Additionally, some ad placements will restrict the objectives you can set. You can’t run a video ad in the sidebar, for example. When in doubt, your ad objective probably works in a news feed ad. Sidebars are the most restrictive.
Step 3: Research and Create a Target Audience
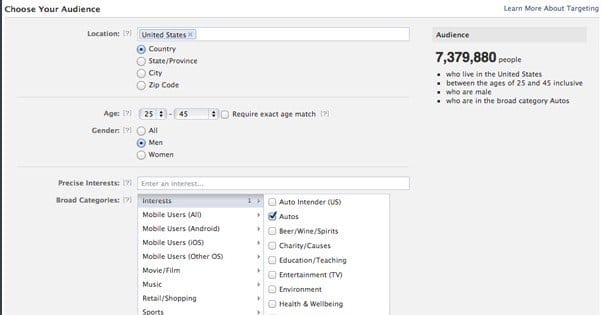
There are a ton of different demographics and interests you can target for your ads. You can set anything from the age range and gender of a user to the followers of pages and people in geographic locations down to the mile. Targeting, then, is insanely important to the success or failure of an ad.
I don’t have the space to go into everything that makes up targeting, but thankfully, I don’t have to. You can go ahead and just read this guide.
What I will say here is just some basic advice. Don’t go too overboard with your targeting, because you’ll end up with a tiny audience and an even tinier reach, while paying more for the exclusive targeting. On the other hand, don’t ignore it; you definitely want to avoid opening your ads up to non-target nations, and if at all possible, you should geographically target as tightly as possible.
Step 4: Prepare Your Ad Copy
If you’re making a news feed ad – and you probably are, given the objective restrictions – you have to carefully prepare your ad copy. You have customizable text in three places; the text post section of your promoted post, the title of the link preview, and the description of the link preview.
The text post portion should avoid using any links or hashtags, as they can hurt your reach and branding on Facebook. Some businesses persist in using hashtags, but it’s been shown time and again that it doesn’t work. Links are redundant, with the entire post itself making up one big link.
Your text should include your main offer, which should essentially be made up of a problem and solution. Come up with a problem your users face, explain how you can solve it, and proceed with the preview image. You have about five lines here before the “read more” button appears, but you rarely will use all of them. Most of the most successful promoted posts are under a tweet’s length.
The title and description, typically, should look like an organic post for maximum clickthrough. However, if you’re using a non-standard objective, such as an event RSVP or an app install, you’ll want specialized copy for those objective.
You’ll want to create several different variations of each bit of copy to test. More on testing later.
Step 5: Choose Several Possible Ad images
Images are more important than text in your ads, and with good reason. They’re the initial draw of your ads, and they’re what gets people to read the text. If they aren’t good enough, you won’t see any attention.
There’s a lot to say about ad images too, so, again, check out a previously written post for a lot more information.
In general, you’re going to want images that comply with all of Facebook’s guidelines on content, up to and including the 20% text rule. You’re also going to want to pick a subject that fits with the objective of your ad. Sometimes this is difficult; it’s hard to pick a compelling image that says to people “I must follow this page!” On the other hand, it’s a lot easier to pick compelling pictures of products when you’re selling those products. When in doubt, pick happy people or abstract art.
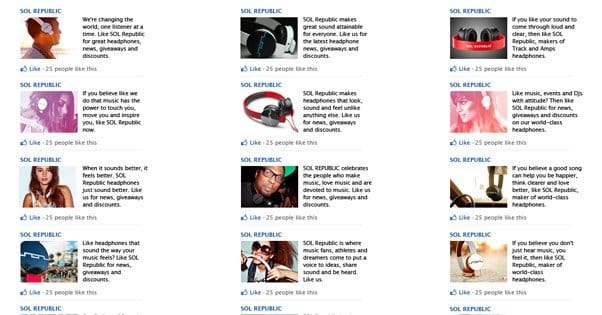
Images will be one of the primary parts of your ads you’ll be testing. It’s not uncommon to see a business with a dozen running variations of the same ad, all of them identical save for the image. Of course, it’s also perfectly viable to test different titles, posts, and pieces of copy rather than just images.
Step 6: Set an Advertising Budget
Your advertising budget should be pretty easy to calculate; just figure out how much money you’re capable of spending on Facebook ads each month, and there you go.
Remember, though, ads will vary a lot in costs. Your targeting, your objective, and your placement will all have an effect on the price. This means to a certain extent you’ll be able to adjust your price for more visibility, but that’s not always the case. Prioritize valuable clicks over number of clicks.
Your budget will also be split amongst all of the ads you run. If you’re running two equal campaigns, and you have an overall budget of $100 per month, don’t set $100 for each campaign. Set $50. Otherwise, you might end up seeing a bill for $200 at the end of the month.
Jon Loomer did an in-depth analysis of the potential costs of Facebook ads. It’s a great read, so, you know, go read it.
Step 7: Create Your Ads
All of the above has been setup; until now, you haven’t done anything within the ads manager. Now it’s time to put the planning to use.
The first thing you want to do is go to the Facebook ad creation page. Here, you’ll be asked to specify basic information about your ad. You’ll be asked to select what you want to advertise. It might be your page, it might be an event page, an app, or an external link. Put it in.
Next, click on the “Advanced options” option. This is where you’ll choose your ad objective. Using the promote page posts or more page likes options are objectives as well, they’re just generic and won’t apply to most of your possible objectives.
Next up, design the ad. Put in your headline, your copy, your image, and so forth. Double-check to make sure everything is typo-free and complies with Facebook’s ad guidelines. You don’t want your ad rejected after all of this work.
Next is your targeting. There are a lot of options here, so go through them and take your time. Make sure to limit by country, set demographic information if you want, and choose interest categories if relevant.
Remember that you can use custom audiences as well. If you’re importing a mailing list or advertising to your current followers, this is where you would set that custom audience.
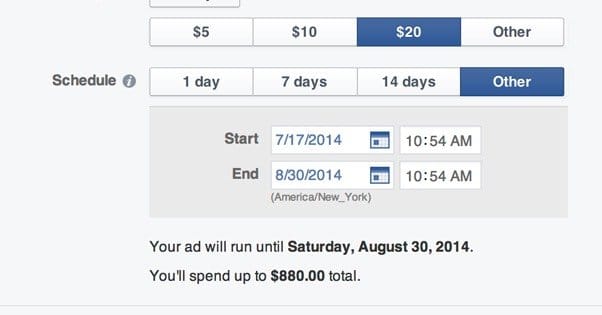
On the next screen, you’ll be setting your campaign name and your budget. Make sure to double and triple check this section, so you’re not going to be surprised by overly expensive ads down the road. This is perhaps one of the number one reasons people fail with Facebook ads; either they spend too much and get nothing out of it, or they spend too little and get nothing out of it. It’s discouraging, so don’t fall for it.
You’ll be asked to input payment information if you haven’t done this before. Go ahead and do so. Once that information is verified, your ad will be free to run.
If you’re making more than one ad, you won’t have to go through this process again, unless the ad is completely different. For variation testing, you can just create a copy of an existing ad and change one variable.
Step 8: Run Your Ads
When you’re testing ads, you want to run them with as little variance between them as possible. You’re testing one variable, and that one variable only. The trick is, you’re just testing several variations at once. So, you might have four ads, all with the same budget, targeting, destination, objective and copy. The only difference between them is the image.
At the end of a fixed period, either of time or of user volume, you pick the winner. Always go with data, not the one you like personally. Your personal interests might not coincide with the general public’s.
I recommend cycling through different tests. Run several ads that test variations on images, and then pick the winner. Instead of testing more images, change up the text. Once you have a winner with the text, you can test something else, like the targeting. Cycle through options.
Why? The main reason is because changing one untested variable can have a much larger effect than further optimizing an already tested variable. You could run a test with a pre-tested variable, like images, and find that the original image was already the best. It’s nice to verify, but it means you wasted time testing something you didn’t need to test.
You can read more about how to properly test Facebook ads here, with this guide from Ad Espresso.
Once you’ve done all of that, well, it’s time to do it again. And again. And yet again. This is your life now, at least until you decide that managing Facebook ads is too much work and you want to outsource it. There’s a reason that’s a viable option. I’m not advocating that you do all of the ad work yourself, not unless you find joy in doing so. I’m just advocating knowing enough about what you’re doing that you don’t shoot yourself in the foot.
