 Written by ContentPowered.com
We’ve written quite a few posts on this site about getting more traffic or views for free, to various services and on various platforms. Today I’m covering that topic again, with a focus on Instagram videos specifically. Many of these tips can be applied to other sites as well, but I’m going to focus solely on Instagram techniques, as well as attributes that make Instagram videos unique.
Instagram Video Details
Before we get specifically into promotion, let’s talk about the videos themselves. Instagram recently boosted the possible length of videos on Instagram up to 60 seconds. This is an increase from the previous 15. It’s quite interesting, actually; the 15-second Instagram video limitation was specifically an answer to Twitter’s Vine video service, which specialized in 6-second microvideos. Twitter closed down Vine, and as a consequence, Instagram no longer needs the short length restriction. They don’t want to attempt to compete with YouTube, or even Facebook Videos, so they’ve kept the one minute limitation. Specifically, Instagram videos can be anywhere from three to sixty seconds long. No more, no less.
Instagram videos also have the same ratio requirements as images for the platform. That means long widescreen videos don’t work very well. You generally want portrait ratio videos, though square videos will also work. For technical details, you can’t exceed 30FPS – sorry 60FPS junkies – and you should upload using h.264 and in an MP4 format.
There’s nothing hugely unique about the videos on Instagram, beyond the potential use of vertical videos. Just strive to make engaging content and don’t worry as much about the format. Now, let’s start discussing tips to get more views and engagement on your videos, shall we?
Instagram is probably the single social network with the largest reliance on hashtag usage. Many people who use the site or app will browse content via hashtag as well as by user and by their followed feed. It’s the primary way new content is discovered; people see a hashtag they like and browse it to find more content they enjoy. Using the right hashtags, then, can result in many more views, engagement actions, and follows.
To understand proper hashtag usage, you need to understand the types of hashtags. If you’re a regular reader, you know all about these, but I’ll go over them for those of you who aren’t familiar with my categories.
- Branded hashtags. These are hashtags that are specifically related to a brand, either your own or someone else’s. They can be as simple as the name of a brand as a hashtag, like #nike or #redbull, or they can be hashtags that relate to specific ad campaigns. Examples of the latter would be #oreohorrorstories for an Oreo campaign or Coke’s famous #ShareaCoke campaign.
- Narrow hashtags. These are hashtags that are specifically relevant to something about your video. It might be the name of a product in your video, it bight be a specific filmmaking style, or even a type of image filter you’re using. It’s narrow because it’s specific to the type of content, not applicable to everything you post.
- General hashtags. These are the most broad categorical hashtags that have a huge number of users and content. Things like #cute or #cats or what have you are all general tags.
- Location hashtags. These are tags relevant to the location of your brand or your video. If you’re doing an event in Rome, you would use #rome. If you’re posting a general commercial video about your location in Omaha, you’d probably use tags like #omaha and #nebraska.
Generally, you’ll be using some of every kind of hashtag. Branded hashtags are excellent to use in moderation; a couple of them will keep promoting your existing brand content and will allow brand fans to see all of your content in one place. The flip side is that branded hashtags don’t reach out and get new users. There isn’t an existing audience for a branded tag; it’s just people who already know and follow you.
Narrow hashtags will tend to make up the bulk of your tags, because they fit the middle ground between overly general tags that move too quickly for your content to be seen, and too specific tags that have no audience. General tags are good for a brief influx of content, but since they tend to have a ton of content in them, your content is quickly pushed down the feed.
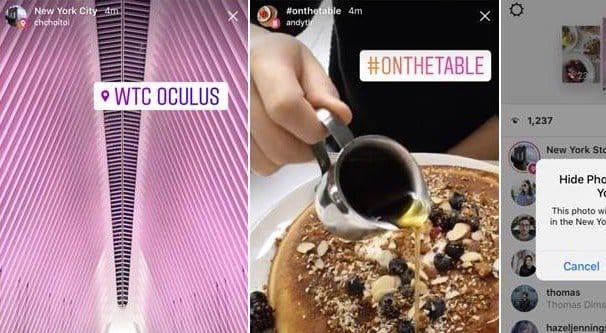
And, of course, location tags are important whenever you can possibly use them. As an added bonus, you can tag your content with your location and get essentially a “free” hashtag out of it.
There are two steps to hashtags; coming up with the right tags and using them in the right way.
Coming up with hashtags: I recommend starting up a good old spreadsheet. Set up some columns for data. One for the tag itself, and one for the category the tag falls into. I generally like to record the amount of content in a hashtag as well. When you visit a tag – a page like this – you can see up at the top the number of posts made in that tag. This example is a general tag, and it has 2.25 million posts.
From there, you can record whatever data you find most useful. I’ve seen people record nothing else beyond how often the tag is used, and I’ve seen others who record every post made with the tag and the engagement it got. It’s up to you whether that wants to be your first line of optimization, or if you have bigger fish to fry first.
Coming up with the tags is a tedious task. Here are ways you can do it.
- Think about your content and what describes it. Was it shot featuring a #sunset? Does it support an #activelife? Is it promoting a #wedding service? You can come up with a ton of ideas, then check to see if they’re worthwhile to use.
- Look at your competition. What kinds of tags are they using? This does assume that your competition is competent and is using good hashtags, of course. Make sure to double-check before you start blindly using tags they chose.
- Look at trends. Trending content on Instagram itself can often be something you can tap into. Just don’t rely on the spike of traffic from a trend; trends come and go. You generally don’t want to keep using a trending tag long after the trend dies down.
- Use a tool. I personally like Hashtagify.me for hashtag discovery and analysis. You can plug in a single keyword or hashtag you want to use and see related tags and the influencers who use those tags. You can also use TrendsMap to see the kinds of tags being used in your specific geographic location.
Always check a hashtag to make sure it’s not actually a branded tag run by a company for its ad campaign. That doesn’t mean you can’t use it, but you want to be aware of the implications of a tag before you use it. You don’t want to do something like use a tag about abuse to advertise pizza.
Actually using tags: Once you have a list of tags, you need to use them. You should select a good mixture of tag types. You want some general tags for the early traffic spike. You want a couple of geographic tags if you can squeeze them in. You want a couple of branded tags to keep your campaigns going. Then you can fill out the rest with narrow tags that relate to the content, your industry, and the video specifically.
How many tags should you use? Studies have shown that using a minimum of 11 is ideal for engagement. Instagram has a maximum of 30 in the description of a post, and I honestly recommend using all 30. The more you use, the more exposure you can get on a given video, which means more views.
I recommend just dumping all your tags in a pile beneath your more organic description. If you try to #work them into #your #description, it becomes a mess of links and is harder to read. It’s also difficult to work narrow tags into a description naturally, so it will read worse.
It’s worth noting here that you can’t scam hashtag traffic by editing your hashtags later. If you edit your post and change the hashtags, it will be removed from the feed of the old tags and put in the feed of the new tags. However, it will also still be in chronological order based on when you posted, so it will be buried in the older posts rather than at the top of the feed.
Write a Good Description
That’s a lot of writing about hashtags, but with good reason. Hashtags are the driving force behind a majority of your visitors. The trick, then, is to convince the people who see a thumbnail and a description to hit play and watch your whole video.
One key component to convincing users to actually watch is your description. Up at the top of your video caption, you write the non-tag description in plain language.
The caption of an Instagram post, photo or video, is limited to 2,200 characters. This includes your hashtags as well as your tagged users and your description. However, when in thumbnail form and in a feed, only the first 120-140 characters are shown. It tends to vary, as Instagram seems to truncate between words rather than at a fixed character number, though I haven’t tested that recently.
What this means is that you have plenty of room to write, but not a lot of room to capture attention. Start with a sentence or two of compelling description about your video. Think of it like a blog post title and subtitle, or a movie name and tagline. It’s something to hook them. Get them interested, get them curious. Ask a question, if your video answers a question.
Since you’re including a ton of hashtags, you’re going to have the “more” button and the truncated description regardless. Go ahead and write a longer description below the fold. The total description should be long enough to stimulate thought and capture interest. If possible, it should carry over from the video and add to it, rather than just describing what’s in the video.
The problem I see most often, other than posting a video without a description or with a single word or emoji description, is that people will overly-describe the video in their caption. When you describe everything that happens in the video, the user has no reason to actually watch the video, right? This includes transcribing a video. Save a transcription for a linked blog post, if you must have one.
Other Factors
There are some other factors you can use to increase video visibility. They all matter less than the hashtags and description do, so I’m listing them all at once and not really elaborating on them quite as much.
- Tag influential users whenever possible. If you create a video in which you mention a partner brand or social influencer’s content, tag that brand or user in your description, below the main description but above the hashtags. Write something short and simple; “Hey @user, we gave you a shout-out!” is plenty. Influencer marketing is potent, so why is this in the “other” section? Think of an influencer as just another hashtag, except they can add some additional visibility if they recirculate your content. One or two influencers will help, but you’re using more hashtags than you are influencer tags.
- Schedule your post to be posted at peak hours. Dig into your analytics and figure out when your specific audience – or your target audience, if you’re aiming for new followers – is most active. The peak hour is the best place to post content for maximum visibility.
- Create great content. This goes without saying, but also, if someone is watching your video to see whether the content is good or not, they’re already watching and count as a view. I don’t recommend a bait and switch, of course, and you should always produce good content. Still, though, the quality of the content is more going to affect engagement and follows than it will views. The exception is repeat viewers; if people see your videos and watch them, and decide your content sucks, they aren’t going to watch the next one they see.
The biggest take-away here is that you really need to put emphasis into your description. Every element of the description plays a major part in attracting the attention of Instagram users.


Thanks so much for introducing our tool to your followers Appreciate it a lot!