 Written by ContentPowered.com
There are a handful of different account type conversions you can do automatically on Facebook. You can convert a personal page into a business page, for example. Heck, sometimes you’re forced to, if Facebook decides you were using your personal page as a business page. You can convert a business page into a managed page using the Business Manager. You can change the category of your business page.
One thing you can’t do automatically, however, is convert a group into a page. Groups are communities; they allow anyone to post and see each others’ posts without restrictions. In a group, everyone is more or less equal. Admins for the group get the ability to sticky their posts, but there aren’t many more features or benefits to owning the group.
Converting a group into a page would subvert the community aspect by making the admins the only ones whose posts are visible. Other people could still post on the page, assuming you have the option available, but they aren’t prominent posts that everyone can see.
That said, pages do have some advantages over groups for those of you who are trying to run a business. Groups can be good for a community, but they can also be filled with detritus; posts you don’t care to see. Rather than censor them, it’s better to just use a page. Pages also have the ever-important access to systems like the advertising tools, the boost posts button, and analytics.
You CAN convert a group into a page, but it’s not a mechanical change. Instead, it’s more about porting the audience over. Be aware, though, that your audience still needs to opt into following the page. You can’t force someone to follow a page, at least not without violating some kind of Facebook terms of use clause.
Step 1: Create Your Page
I’m operating here under the assumption that you have a group community based on your business, your brand, or your event, and you want to make a page for it. If you already have a page, you can skip this step.
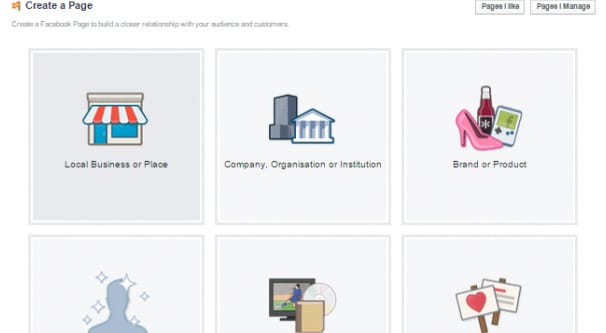
The first thing you need to do is actually make the page you want to use. It’s easy enough to make a page; just click this link and follow the prompts. You will have to choose what type of page you’re going to create, but don’t worry too much. Page type is not a limiting factor, it just helps with categorization. Pick the category that most closely matches your group’s purpose, whether it’s a business page or a community, a public figure or a brand.
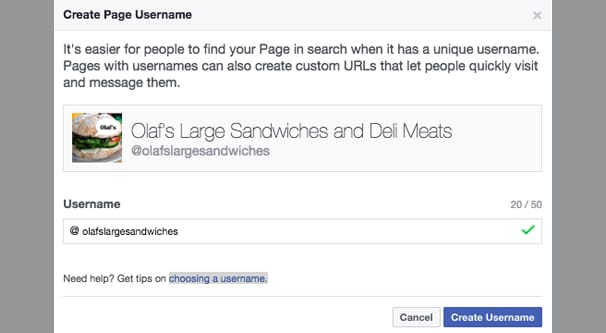
Make sure to use a name for your page that is similar to your group name. You want to make sure there’s a smooth transition, and a dramatic name change doesn’t work; people will be skeptical as to whether it’s the same people behind the page or not. If the name you want to use is taken, try to find a variation that works. You may want to make sure that the existing page using your name is not trying to impersonate you; if it is, you can file a trademark dispute or even take it over.
Once your page is created, it will be unpublished. You can use this time to add in information like a description, a cover photo, and a profile picture. Again, make these match those of your group as closely as possible so people trust you when you go to convert the audience over. Fill out any additional forms and fields you can.
If you have any moderators for your group that you want to remain moderators for your page, you can go ahead and invite those moderators to follow the page and appoint them their role. There are actually six page roles, so make sure you choose the right one. Don’t appoint anyone as an admin unless you explicitly trust them to be a partner. Generally, you will want to use the moderator or editor roles, depending on whether or not you want your moderator to be able to edit the page information, create posts, or just be able to manage comments and content. You can see the full list of page roles here.
Step 2: Choose a Transition Period
Once you have your page created and your moderators appointed, you need to decide on your transition period. This is mostly necessary if you’re going with step 4 rather than step 5 below, but it’s still useful to keep in mind.
Your transition period is essentially the time you’re willing to spend on the group before you transition your attentions to the page. Facebook recommends about a 30-day period, but you can make it as short or as long as you like. Just remember that not everyone logs on every day, and not everyone checks their groups every day.
Once you have your transition period in mind, you can publish your page. Publishing your page makes it publicly viewable. You’ll probably want to make an organic post saying that it’s the new official page for X group, so the people who transition over will know it’s you.
Make a post in your group and sticky it. This post will be an announcement with a link to your published page and any details of the transition. For example, make sure to announce whether or not you’re planning to close your group, abandon it, appoint different moderators, or keep it around as a community.
One recommendation: I generally find it more effective to announce that I’m closing the group so that more people transition over. If you are keeping the group around, a lot of people won’t follow the page because “what we have is good enough for me.” If you’re taking that away, they have nothing, so they have to follow you to have something. If you’re planning to keep the group around, you can announce on the last day of your transition period that due to demand you’ve decided to keep it. Who cares if it was premeditated and it’s a lie; it’s effective, and you’re not breaking any rules in doing so.
Throughout your transition period, post the occasional announcement to remind people of the coming deadline and link them to your page and/or your group announcement post again. The more reminders you post, the more people in your group will see it throughout the month. This is one area where Facebook’s algorithms tend to work against you; your least engaged users are fairly unlikely to even see your group posts, and might never notice it closing. Unfortunately, there’s nothing you can really do about that.
Step 3: Invite Your Group Members
Some time after you have posted your announcement – I generally pick the next day – you should start to take action to build your page audience. The primary action you should take is under “tips for your page” for a new page. You will want to click on the “invite friends to like your page” and choose your group as the audience. When you click this button, Facebook will send a notification to the members in your group asking them to follow your page. This works in conjunction with your organic posts to give people an easy button to click to follow your new page.
Be aware that there are limitations to inviting people to follow your page. You have to select people more or less manually, and there are volume limits. You can’t send out too many invites, and once your page grows beyond a certain point, you can’t send out invites at all. This is all to prevent pages from spamming Facebook with invitations. Trust me, you would be really tired of it by now if they allowed it.

Unfortunately, this means large group communities will have a harder time transitioning everyone over. If you want, you can hold off on sending the invitation until you’ve had a broad initial response to your organic group post. This means you’ll risk passing the limit and being unable to send invites, but it also means you’ll be able to send invites to the people who don’t initially respond, i.e. the people less likely to be checking your group daily.
Generally, you want to send as many invites as you can before the option is removed entirely. Make use of the tools you have before they disappear, essentially. It should be noted that you can’t send a second invite to someone you’ve already invited before unless they explicitly cancel the invite. If they just let it sit and exist, ignored, you can’t do anything.
Step 4: Either: Close Your Group
Up above I mentioned that you could do either step 4 or step 5. That’s why they’re labeled either/or; you can only pick one. They are, in fact, mutually exclusive options. You’ll have to decide which you want to pursue.
This one, step 4, is to follow through with your plans and close your group. There are two ways you can go about this, and it’s up to you to decide. The two options are to close it and delete it, or simply lock it from future posting.
Locking a group is easy. All you have to do is click the gear icon in your group and choose to edit the group settings. Check “only admins can post to the group” and save your changes. This effectively closes the group; no one but assigned admins can post or change the settings back.
From here, if you want, you can just leave the group available for posterity. If your group is full of useful reference material or helpful comments, it can be worthwhile to leave it visible and accessible. On the other hand, having a closed group doesn’t prevent it from showing up in group search, and you’ll probably still have people applying for access. This can be disruptive when you’re trying to focus on growing your page instead.
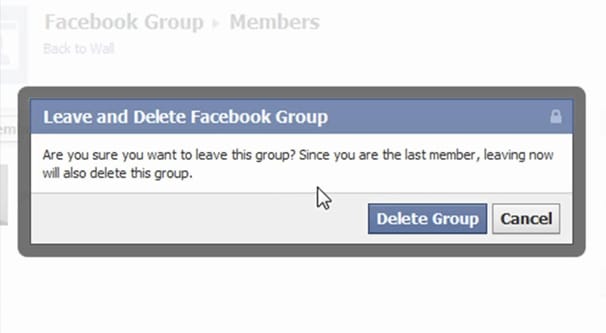
If you don’t want the group to continue to exist, you’ll have to slowly and tediously remove everyone from the group. Go to the group About section and look for your member list. Each person in the list will have a button next to their name. You will have to click it; it’s the “remove from group” button. In the case of fellow admins, you will need to remove their admin role first. Once you have removed everyone from the group, you can then remove yourself from the group. Once the final person has been removed, the group will be deleted automatically. Facebook does not keep empty groups around.
Be aware that there’s no way to recover your member list, and once your group is deleted, it is gone forever. Save any member lists, posts, or content you want to keep before you close the group.
Step 5: Or: Make a Group Tab
If you find that this option is extremely tedious, or that you want to keep the group around as a community, you can do that too. Decide whether you want to keep managing the group yourself or if you want to appoint one of your moderators as the head person in charge. Make sure you trust whoever you have managing your community. It can be worthwhile to actually hire them as a community manager; this way you have official policy to control their actions, rather than the potential for a schism and fractured community.
If you’re keeping the group around, you can tie it into your official page as well. Go to yo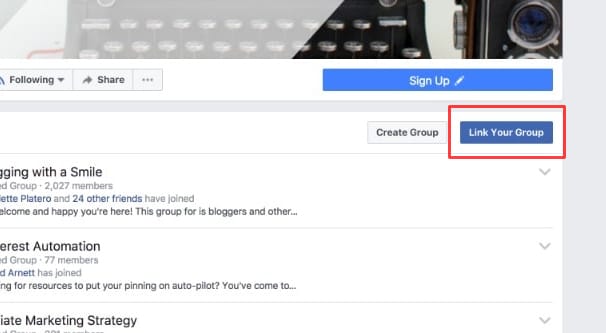 ur page settings and click to edit your page. Find the tab apps section and click to create a new tab. Tab apps are essentially boxes on your page that link to something else; in this case, you’re adding a tab that links to your group. You can set up the name and destination for the app to reflect that it’s your official Facebook community group.
There’s only one problem with this option; you can only do it if you have over 2,000 followers for your page. This is a limitation on pages in general. If you have fewer than 2,000 followers, you won’t be able to create a new tab app. You may be able to use specific whitelisted apps, but a Facebook group app is not one of them. You can read more about tab apps here.


