 Written by ContentPowered.com
Facebook Live streaming is Facebook’s foray into the wonderful world of live video, competing with YouTube’s livestreaming service and, of course, Amazon-owned Twitch.tv.
Facebook has a few advantages over the other systems, most notably in how easy it is to set up and start streaming with nothing but a cell phone. They encourage using it casually, but of course, brands jump on every new trend as soon as a single conversion comes out of it, so it should come as no surprise that businesses want to know every single detail about the streaming system as soon as possible.
The question on tap today is pretty simple. When you run a livestream via Facebook Live, what happens to the video?
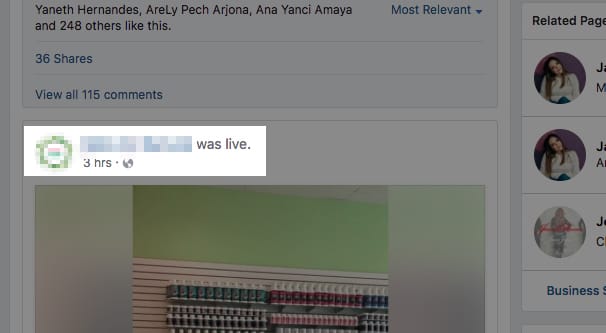
According to the Facebook Live page here, the answer is equally simple. “The video will be published to the Page or profile so that fans and friends who missed it can watch at a later time. The broadcaster can remove the video post at any time, just like any other post.”
What This Means
There are a few quirks to this system.
First and most notably, there is currently no way to pay to promote a livestream post within Facebook Ads. If you’re actively streaming, that’s it; it’s a streaming video that anyone can tune in to watch, but any promotion has to be done on the fringe. You can buy ads to boost posts or run sidebar ads that lead to a post that announces you’re going live, and has a link to your live video, but you cannot actually pay to promote the live video while you’re streaming.
That said, as soon as you’re done streaming, Facebook will finish recording the stream and will, after some processing time, make the stream available as a video post on your page. This post will work and act exactly the same as if you had a video that you uploaded. All chat that went on during the stream is recorded and left as comments on the video post, with the relevant timestamps for those who watch it later.
This recorded video post can be boosted and promoted the same way any other post can be promoted. If you want to pay to get more people to view your recorded livestreams, you can do that without any issues. There are no restrictions as far as I know regarding the targeting options available on recorded videos.
It would absolutely not surprise me to find Facebook allowing people to promote live videos in the future. The only reason it doesn’t happen now is probably due to how varied and non-granular ad viewing is right now. It makes no sense for you to pay to promote a live video if people won’t see the ad until after the video ends.
After all, Mark Zuckerberg isn’t as rich as Jeff Bezos yet, so more ways to monetize Facebook are going to crop up whenever they feel one is viable. I figure it’s only a matter of a year or so before Facebook fully encourages gaming content and tries to step on Twitch’s toes, just like Twitch is encouraging IRL content to get people to broadcast non-gaming events.
I’m going to take a moment to talk about privacy settings. Unlike something like Twitch, which is visible to everyone, Facebook has post privacy settings. If you’re a personal profile broadcasting, you’re able to choose to broadcast to friends only. This is useful for personal users who just want to share with friends, of course, and can be a good anti-stalking feature, but it’s not so useful for brands.
What IS useful for brands is the ability to set a stream to “only me.” Since a Page generally has a personal profile attached to it, you can use the personal profile privacy settings, set to “only me”, as a test. Run a few sample streams to make sure you work out the kinks of broadcasting before you want to go live for the first time. When privacy is set to only you, the archived video will also be set to only you, and you can delete it without issues immediately after it appears.
It’s also worth noting that if you’re broadcasting via the app on a cell phone, your video doesn’t necessarily get posted immediately. You’re given the option to post your video replay, and you can choose a different set of privacy settings for it than you did while broadcasting. You can also choose to delete the replay before it’s posted as a video, just in case you’re worried about someone seeing it in the first few minutes after it goes live. This is most useful for those short test videos or broken videos with tech issues; if you don’t want the video to stick around, just don’t let it post in the first place.
Now It Gets Interesting
Now, all of the above is relevant primarily for the people who do off-the-cuff streaming, short announcement videos, and other content that doesn’t need to be really produced. We business marketers, though, we like to go the extra mile. I’m sure you’ve read various posts about using live video for marketing. You’ve probably seen that one of the first recommendations is to drop the whole “stream with your cell phone” thing and get some real equipment.
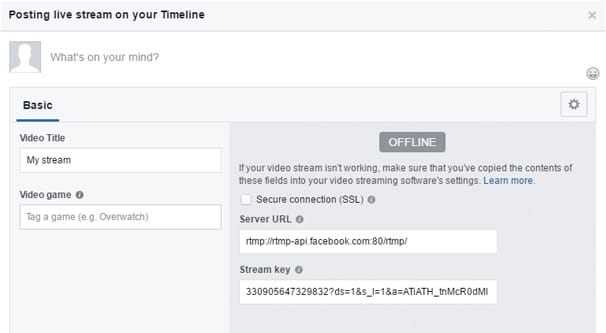
Whenever your broadcasting with real equipment, you’re likely going to be using real software, rather than just whatever built-in camera access Facebook’s app has. Whether it’s OBS or XSplit or Bandicam or Camtasia or whatever else, it will have a few useful options that you as a brand can really put to work.
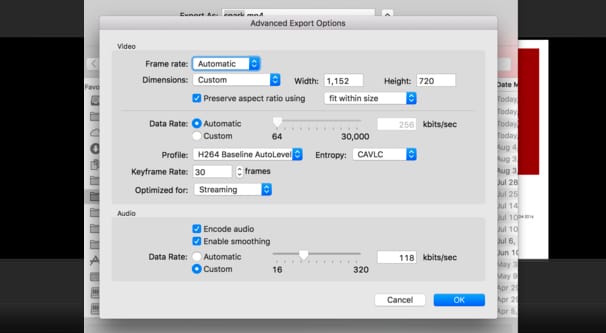
Streaming can be hard on bandwidth. It requires a pretty high upload speed to upload 1080p video at 60 FPS, and it takes a pretty strong download on the part of your users to view that kind of content. In fact, Facebook puts limitations on their streams. They recommend a bitrate of 4,000 KBPS, a maximum resolution of 720p at 30 FPS, and they limit you to H264 video encoding and AAC audio encoding. Attempting to use higher settings or a different encoder is going to cause your stream to fail.
720p at 30 FPS is serviceable for most uses, but why not go for more? Programs like OBS are able to record video locally while you stream. In fact, they can stream one output while recording another.
What this means is that you can broadcast your downscaled 720p video at 30 frames per second, while recording a local version of the content at 1080p at 60 FPS, with different encoding if you want. You can record multiple audio tracks, or you can record the audio and video separately, run filtering and effects over the audio, and layer it back onto the video. The sky is the limit.
My tip is to, well, do that. Record your high quality live video and audio. Then do some editing work. Crop out technical difficulties, stumbles, re-tries, and other issues that don’t make for good watching.
Now, this is where you have a decision to make. If you want, you can keep the original version of the live video as a post on your page, and upload the edited version later. This is like a definitive edition, a re-release of the content with the blemishes painted over. Newcomers to your page will find it a much more pleasant experience than watching an unedited livestream. If you have a lot of chat reactions and communication happening through comments, you don’t want to delete the original video.
On the other hand, if your live video doesn’t get much in the way of chat reactions, there’s not much reason to keep the live post around. You can delete the original post and upload the edited version as your recorded history of events.
The main reason I recommend recording a version of your video locally is for archival and future uses, though. Facebook doesn’t always make it very easy to download a version of your live video, and even if you can download it, it’s going to be lower quality than what you can record locally.
When you record the video locally, you can use it as a resource in the future. Once you have broadcast a few live videos, you can take the best moments from them and chop them up, putting them into one 2-minute teaser video. Once you have a teaser video, with complete video editing effects, audio filtering, and whatever other shenanigans you want to put onto it, you can upload that as a sort of trailer and commercial for your future livestreams. A “here’s what you’re missing by not tuning in” video.
With that trailer video uploaded, you can pin the post to the top of your page. A pinned post is the first thing visible to your users when they visit your page itself, which means they’ll be more encouraged to watch you when you’re live. In the description for the video, you can include a streaming schedule if you have one, or just a schedule for the next stream you have planned. Keep this edited to be up to date, of course. You can also include steps a user can take to turn on notifications for your videos, so they are notified when you go live. And, of course, you’re free to boost the post and promote it as an ad, to get even more people to see what they’re missing by not following you and watching your videos.
Of course, there’s no rule that says you can’t promote your Facebook streams in other platforms. You can tweet a link to that video and to your live videos. You can post your trailer video on YouTube. Heck, if you’re feeling really ambitious – and you have a high enough upload speed on your internet connection – you can use more than one piece of software to simultaneously stream to Facebook, YouTube, and Twitch all at once. It’s a bit of a pain to manage them all at the same time, but I’ve seen some people do it to fairly good effect.
Other Post-Stream Actions
Once your Facebook live video broadcast ends, the video becomes a post on your wall. That’s not all that happens, though, and there’s a lot you can do moving forward. I’ve already talked about saving local videos and making use of the footage, but Facebook is Facebook. Obviously they’re going to record a bunch of analytics about your broadcasts.
It’s worth looking at the metrics for viewers and activity and keep an eye on what you’re doing in the video that gets the best response. Likewise, look at what gets you the worst or most negative response. As with all marketing optimizations, do less of what doesn’t work, and more of what does. You can’t really split-test live videos, but you can make incremental optimizations and see if you improve.
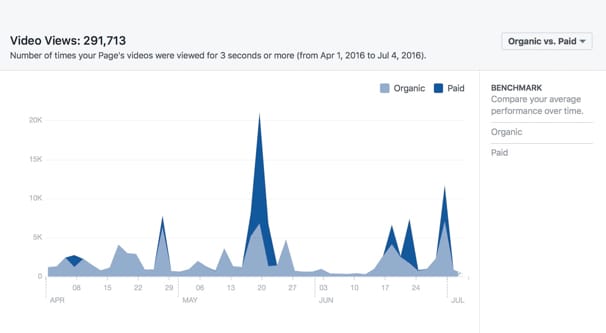
For Facebook live videos, the metrics Facebook saves are fairly basic. You can see your minutes viewed, unique viewers, video views, percent completion on average, reaction/comment/share breakdowns, peak live viewers, and demographics. Every metric can be clicked to see it in a timeline graph, showing how they changed over the course of the broadcast.
Did that answer your questions? I should hope so, it was a pretty simple bit of information. Regardless, if you still have questions about how to be a superstar in the world of Facebook live broadcasts, you’ll want to dig a little deeper. I recommend getting to know some of the real authorities, like this post on Wordstream. Get your thinking cap on, internalize some good advice, and you can be engaging with viewers in no time flat.
