 Written by ContentPowered.com
A Facebook Catalog is part of the Facebook ads system, and it’s a system that allows you to link a product feed from your website into Facebook.
Why is this an important or valuable tool? Imagine this situation. You have a product you want to sell. You have 10 of that product in stock. You decide you want to run some ads to sell that product, so you make an ad saying you only have a limited number in stock and need to sell them quick.
Fiteen people are interested in your product because of the ad and click through. Ten of them buy the product. Now you have five people who were interested in your product but can’t buy it.
In this scenario, Facebook doesn’t have information about your products beyond what you plugged into the ad, so they don’t know you only have 10 of them. If they knew, they could have stopped running the ad when you ran out of product.
By giving Facebook a direct feed of product information, you enable three things.
- You allow Facebook to pull crucial information like product quantity and price, to make sure ads are accurate.
- You allow Facebook to dynamically alter ads based on product availability information.
- You are granted access to certain types of Facebook ecosystem ads that you wouldn’t be able to use otherwise, like Instagram shopping tags or a Facebook shop.
You can set up one catalog or several, depending on what you want to use them for. They’re a great system if you can use them, but not everyone can.
What You Need to Use Facebook Catalogs
In order to set up and use a Facebook catalog, you need a few things before you can begin. Some of them are required, while others are only technically suggestions.
- A product catalog that complies with Facebook policies. Adult products, illegal products, firearms, and other kinds of products are not eligible for Facebook ads, and are thus not eligible for a Facebook catalog.
- A website with a storefront on it. Obviously, if you don’t have a website with a product catalog available, you can’t give that information to Facebook.
- A Business Manager account with your store linked. You need this for part of the catalog creation process.
- Accurate and up to date product information on your website. Facebook is pulling product data from your site, so if your site doesn’t have accurate information, neither will your catalog.
- The Facebook tracking pixel installed on your website. This allows Facebook to access information on your site, as well as track specific information like sales.
- A Facebook Page. You don’t technically need a Page in order to run ads, but not having a Page cuts out on your ability to run certain kinds of ads, like boosted posts or new follower ads.
- An Instagram business account. You don’t need this unless you intend to run Instagram shopping ads, but if you do, it’s required.
Additionally, if you have an extremely large product catalog, you can get Facebook API access so you can upload data using the Batch API instead of manually through their data feeds.
Creating a New Catalog
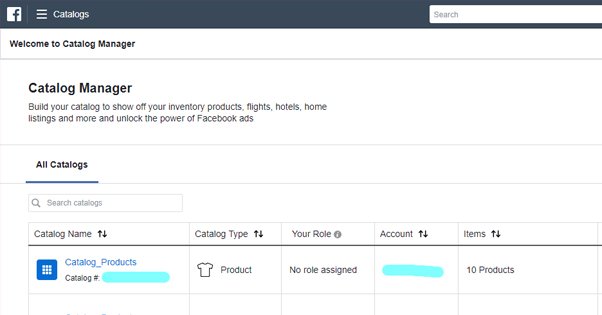
You can create a new catalog quite easily by going to the Catalog Manager and following their wizard. Rather than let them guide you, though, I’ll walk you through the steps.
Before you begin, make sure you have created a Business Manager account and linked that account to your business. You can read more about that process here.
1. The first step for creating a product catalog is to click the Catalog Manager link up above.
2. Next, you will be asked to choose the kind of business you run. As of this writing, the categories are e-commerce, travel, real estate, and auto. Each different kind of business has a different format for product data and what data is relevant changes, so each kind of catalog is formatted for that kind of business.
Each category has sub-categories. E-commerce just has products, but Travel has hotels, flights, or destinations. Real estate has home listings, and auto has vehicle listings. Alright, so only one category actually has sub-categories, but it’s possible in the future that Facebook will add more categories to differentiate different kinds of products. Choose your category and sub-category, then click Next. For the purposes of my directions, I’ll assume you just picked e-commerce products, because that’s what the majority of you reading this do.
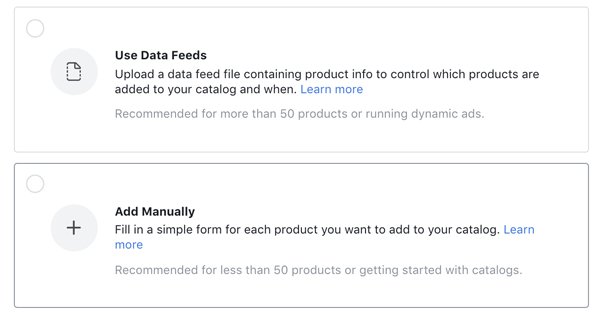
3. Next, you have to choose where your product info is coming from. There are two options: manual data uploads or connecting to an existing e-commerce platform.
If you use an ecommerce platform on this list, you can link it to Facebook. The list is:
Shopify, BigCommerce, WooCommerce, Magento, 3dcart, Storeden, or OpenCart.
Otherwise, you’ll have to manually upload data.
The process for linking a platform is easy. Just click the platform option, then click the specific platform you use, and follow the instructions. Facebook will guide you through the process, which will vary based on your platform.
If you’re going to upload your product catalog manually, you have to give your catalog a name. I recommend a memorable and valuable name. Don’t name it something like “Catalog1”, name it something like “Shoe Catalog”. This way you’ll always remember what products are contained in the catalog.
Once you click Create, you will be asked to choose a business. This is where you select the business you created in Business Manager. You can also skip this part and choose Personal, but Personal catalogs have fewer options for ads than business catalogs.
Now you have a catalog, but you still need to add your products to it.
Adding a Product Feed
There are technically five different ways to add a product feed to a catalog once you have created that catalog.
Method 1: Adding products to a catalog using the Facebook Catalog Batch API. In order to use this method, you need access to the Batch API. You will also need the coding skills to know what all this is and how to interact with it. It’s an advanced method and it’s only really recommended for storefronts where your data changes a lot, or where you have huge amounts of data such that a typical import process will take a long time or risk timing out. You can read about the documentation for the Batch API here.
Method 2: Adding products through syncing with an existing e-commerce platform. This was already mentioned up above. Facebook integrates with several e-commerce platforms and will pull data automatically once you give it access to do so. Here are the instructions for each platform:
Simply follow the instructions provided by Facebook and you should be good to go.
Method 3: Adding items manually. The manual method requires you to add information for your items individually, one at a time. It only works for up to 50 items, and as such, it’s only really viable for small storefronts or storefronts where you don’t have to update data very often.
Additionally, this method works for all types of catalogs except real estate listings. Real estate listings will need to use another data entry method.
This method requires you to have item details and item images on hand. Images need to be formatted to work with Facebook’s ads system; item images that are too small or are too extreme of an aspect ratio will not work.
In order to use this method, go back to the Catalog Manager and open up your new catalog. Choose your category of products and choose the product type you want to add. Click Add Manually, and then click Next.
Add an image for your item, and then fill in the product details for that item. You will need specific kinds of information depending on the item. For example, a product will need descriptions, while a vehicle needs the make and model, and a flight needs departure and arrival airport locations.
Once you have filled out the information for one product, click to save it and then click to add the next item. Repeat this for every item in your storefront, or at least every item that you want added to a Facebook catalog.
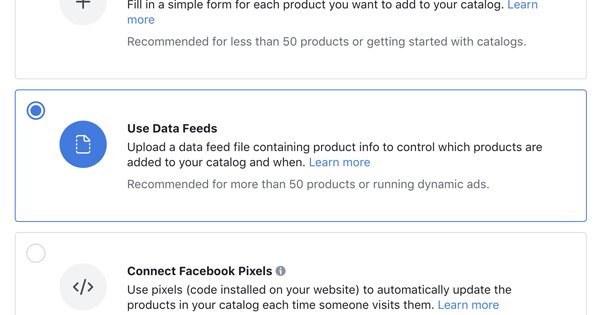
Method 4: Adding a data feed file. This is another manual method, in that you have to do it manually, but it’s more automatic in that you’re uploading one batch file with all of your information for Facebook to parse and add as new products.
I believe this method only works if you have more than 50 items in your catalog, but it may not actually be limited and just recommended. All catalog types, including real estate, can use this option.
Your data will need to be formatted as a CSV file, a TSV file, an XML file, or as a file hosted on an external server. Additionally, you can come back and manually re-upload your file for updates, or schedule regular re-uploads of a file stored externally for a semi-automatic update process.
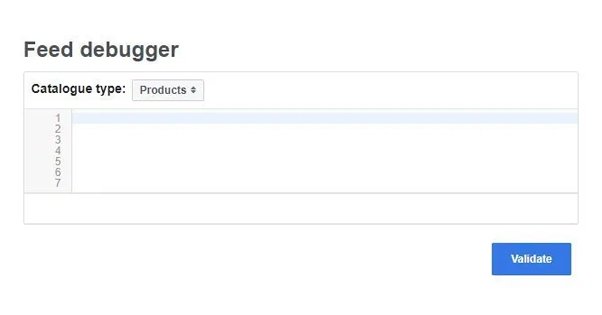
Before you begin with this method, you need to create your data file. Facebook has instructions for that here. Different forms of catalog have different structures and data feed specifications, which informs Facebook on how the data is structured. You can read more about that here.
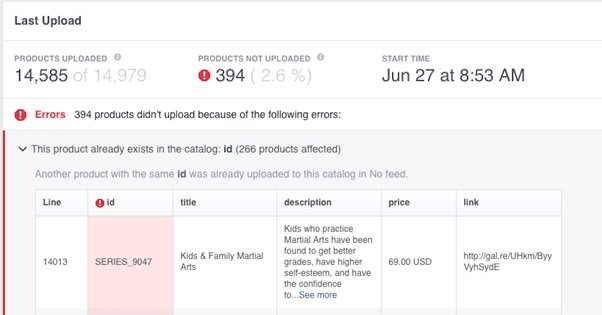
To avoid screwing up your catalog with malformed data, I recommend running your data file through the feed debugger tool to make sure it validates.
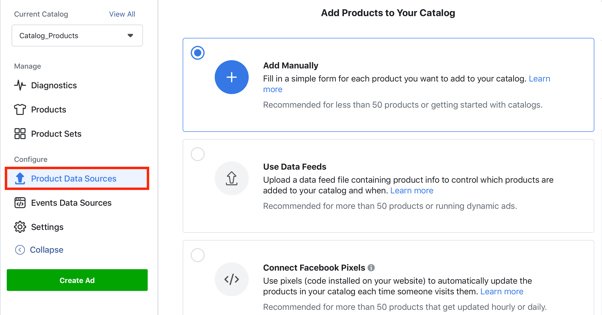
In the Catalog Manager, choose your catalog and then choose the type of data source you want to upload, such as “vehicle data sources” or “product data sources”. Click add products, and then click Use Data Feeds. Enter a name for your data feed, descriptive of what that feed contains, and choose a default currency.
Here you can either update your file manually, or you can choose an upload frequency for data updates. This can be hourly, daily, or weekly. Note that if you want your data to upload manually, you need your file to be stored online in an accessible location for Facebook to pull it. You will choose the URL of the file and upload that. For manual uploads, simply upload the file from your computer, no need to place it online. I highly recommend the automatic version just to minimize manual effort required to keep your catalog up to date. Simply update the file when something in your inventory changes.
Note that you will need to keep your file updated, not replaced. I’ve seen people have issues with this system because they keep replacing the file with one that has a different name. Facebook looks for the same file you gave it, so if you change the name, it won’t find it.
Method 5: Connecting to a Facebook pixel for data imports. This is another 50+ items method, and unfortunately it is limited to ONLY e-commerce product catalogs. Sorry autos, real estate, and travel; you can’t use this option. You can still use the Facebook pixel for other forms of tracking, but product catalog tracking doesn’t work.
![]()
In order to use this method, you need to have the Facebook pixel installed on your website. You will also need to set up microdata tracking for your product pages. This means using structured metadata to tag the relevant pieces of information on your product pages, like the image URLs, the description, and the price. You can read more about that here.
The hardest part here is simply setting up all of the tags properly on your website. Depending on your site configuration, this may be easy or difficult. I know that some e-commerce plugins have the data already tagged, and some can enable it easily. Others will require manual tagging in your pages or page templates.
To add this product feed, go to the Catalog Manager and click to add a data source. Add a new product and choose Connect Facebook Pixels. Facebook will ask you to select which pixel and verify your data, and from there it should all be set up and running. That’s it!