 Written by ContentPowered.com
We like to review programs and apps for this website, so you know what you’re getting from an honest point of view. We’re unbiased and we’re not paid to write the reviews, nor are we pushing affiliate links when we post them. Reviews like this one help you learn about a product and decide if it’s something you want to integrate into your marketing.
Post Planner is a tool that is frequently mentioned but altogether poorly documented. At first glance, it has all the hallmarks of a black hat tool, even though it’s nothing of the sort. It simply has too few reviews from credible sources. It’s a shame, because their blog is actually an excellent source of information. That’s why I figured we’d write one of our own.
What is Post Planner?
Post Planner is a social media publishing and scheduling tool. It helps you figure out what kinds of posts and content you should be posting, and helps you post those posts at the right times and on the right networks. It also has a content curation engine that helps you find the top tier content in your industry, so you can share excellent and engaging content in between your marketing messages. As we know, curation is a huge part of a robust content strategy, so even this part of the tool alone can be hugely valuable.
Of course, no central social media hub is complete without an aggregated dashboard that helps you consolidate all of the content you have coming in and want to curate all in one place. It’s quite like Buffer in that respect, allowing you to “curate” content to a central hub, from which you can post it to your various social accounts quickly and easily.
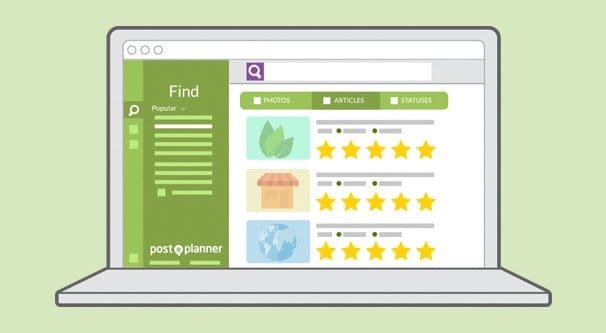
Using a proprietary ranking system, Post Planner rates content with a star rating that indicates how likely your audience is to engage with the content you want to curate. It’s not a hugely tailored rating – it doesn’t analyze your audience specifically – but it does consider the existing engagement on the content to help you decide how to engage.
As with any web app that deals with posting, Post Planner has built in analytics to show you the reach and engagement metrics for your posts across your social profiles. It also has an optional sharebar you can use. What is that?
The Post Planner sharebar is essentially an iframe overlay, like a Hello Bar, at the top of whatever site you link out to. You’re not really disrupting the users with interstitials or large lightboxes; you’re just a bar at the top of the screen. Anyone who clicks on a link your curated is taken to that page, just with a bar at the top for you and your content as well. This is often used for either a text ad linking to your page, or an email opt-in for your mailing list.
Post Planner has team features for collaboration if you’re managing several businesses or pages, or you have a large enough team to warrant giving everyone access directly. You also have the ability to create posts in an excel file and upload them in bulk. The app reads the information in the file and helps you schedule the posts to appear at the right time.
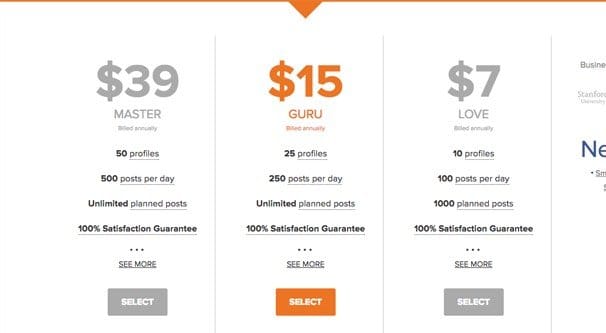
Post Planner has seven different pricing tiers. All tiers are billed annually, so make sure you’re calculating the price out accordingly. You can use monthly milling, but it increases the costs quite significantly
- Free: This tier is, obviously, free. It only allows you to link one social profile and post five posts per day, with up to 25 scheduled. It only includes the viral photos, top articles, and status ideas engines. No additional features are included.
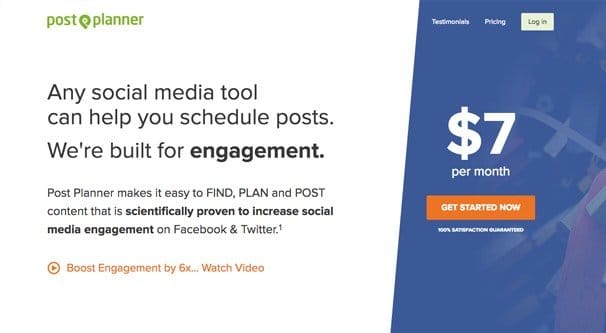
- Love: This tier is $7 monthly. It allows you to hook up ten profiles in total, and allows you to schedule and curate up to 100 posts per day, with an additional 1,000 scheduled for the future. It works for Facebook and Twitter, gives you the share bar, and has the status ideas engine ready to go.
- Guru: This tier is $15 monthly. It increases your profile limit to 250, with 250 posts per day and unlimited scheduled posts. It includes support for up to four team members, gives you bulk uploads, a custom domain, and the email opt-in forms.
- Master: This tier is $39 monthly. It bumps your limit up to 50 social profiles and 500 posts per day, up to seven team members, and post targeting support.
- Agency: The same as the above, but 100 profiles, 1,000 daily posts, and 11 team members. $79 monthly.
- Venture: The same as the above, but 200 profiles, unlimited daily posts, and 25 team members. $199 monthly.
- Enterprise. This is the typical “scales with your needs” tier that offers all of the additional features, and allows you to work out a deal for a number of profiles and posts per day that suit your needs. Pricing, of course, depends on your needs and the deal you strike with their sales team.
As of now, Post Planner only supports Facebook and Twitter. They have the ability to pin posts to Pinterest as well, but it’s not supported in their analytics engine. You’re able to pull in content from Instagram to share on other sites, but you can’t post to Instagram from the app. You can post to Facebook groups, but only if you’re the owner or administrator of the group; members alone cannot post via apps using the Facebook API.
Using Post Planner
The actual process of using Post Planner is simple.
The first thing you need to do is log in through Post Planner and go to their dashboard. They are no longer an in-site Facebook app, so you’re logging in through their web app dashboard.
Click the gear icon in the lower left corner and you will be taken to the social networks tab. If you haven’t linked any profiles, you’ll see essentially a blank field with some buttons and a count. The count is the number of profile slots you still have available according to your plan level. All you have to do is click the “connect” button and the app will pop up the log in box for whichever network you’re using. Fill in the information and the profile will connect.
Make sure the icon that appears – the small version of your profile picture – is bright and colorful. It might be grayed out, and toggles when you click it. When the icon is grayed out, it means the profile is disabled for posting. Make sure it’s enabled if you want to be able to post to it via Post Planner.
Once the profiles you want to post to are enabled, all you have to do is start using the app the way it’s intended to be used. You’ll want to click on the Find tab on the left, and then click a category. Anything under Popular will be high rated articles that are trending and popular. All you need to do is click the share button there, and follow the steps to add it to the composer.
At this point, you can add other kinds of content feeds. You can add hashtags, you can add Twitter accounts, you can add keyword searches, you can add RSS feeds, and so forth. Running custom searches will get you content you can either share or add as a source. Adding content as a source means that in the future, content from that source will be plugged into Post Planner and rated, and you can curate directly from there without having to run the search every time.
To make an actual post, you need to find the content you want. If you’ve saved it in the compose window before, it will be under “My Content.” Otherwise, just pick something from the content pool. This adds it to the composer up top.
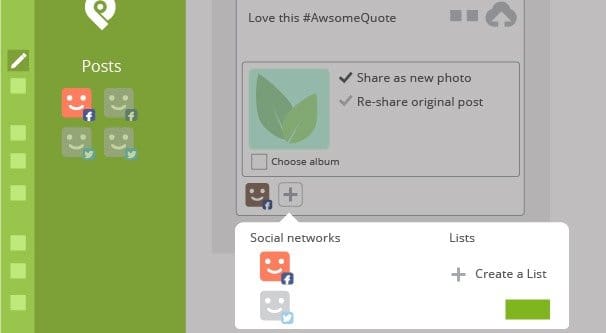
The first thing you want to do is click the + at the bottom of the composer. This brings up a list of your social networks linked to Post Planner. Click to highlight the ones you want to have making the post. You can then click “add to plan” and the post will be added to the end of your post sharing queue.
Instead of clicking “add to plan”, you can click the arrow next to it to get other sharing options. Share next puts the chosen post next in line so it’s shared faster than other content in your queue. Share now immediately shares the post to your associated feeds, and is ideal for cases where the post is very time sensitive. Schedule Post will put the content on a calendar to the point you choose in time.
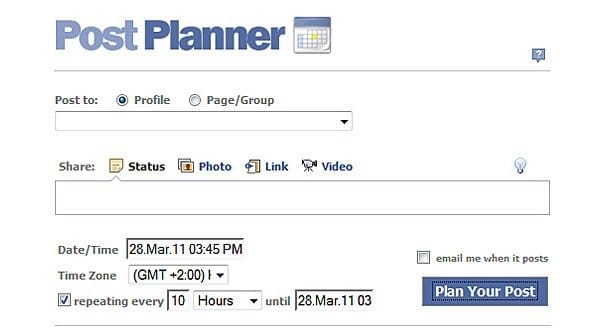
If you want to post something of your own rather than something curated, you can do that from within Post Planner as well. Click the “post” button on the far left bar, rather than Find, and you will be brought to a blank composer. Here you can create a post the same way you would on Facebook or Twitter, adding text, images, videos, or what have you.
All links you share through the Find engine, as long as they weren’t links to manually added, have post information already filled out according to the meta data provided by the site. You don’t have to worry about your posts showing up as nothing but a text post with a link that has no preview.
Advanced Thoughts for Post Planner Usage
Now, I will say this: Post Planner is a relatively simple social manager. It’s not going to be valuable to everyone. I consider it a supplemental tool for content creation, not a hub for all of your social media activity. Here’s why.
1: It’s limited to mostly just Facebook and Twitter. You can use Pinterest more or less through a workaround, not through actual integration. You can use Instagram as a content feed, but not as a place to post. You can’t use other networks at all, like LinkedIn or Google+. This means it’s rather firmly dedicated to a certain sort of small business, the ones that use Facebook and Twitter but that don’t really care about the other networks.
2: The composition tools aren’t all that robust. You need to have a pretty high tier plan before you get post targeting, and without it, most of your posts are just going to go to your general audience. That’s fine, but it takes some finesse out of the whole system. Plus, there aren’t really integrated composition and analytics tools to tell you, for example, how well a hashtag you want to use is performing.
3: You don’t have options to manage ads through the dashboard. Businesses rely on ads, and not being able to manage your content and your ads all in one place is a serious drawback. It’s a lot of work to make an ads manager, of course, and I know why Post Planner hasn’t done it – it’s outside the scope of their plan – but it’s still a detriment.
I like to use Post Planner as a supplement. Essentially, I have a different tool, something like Buffer, Hootsuite or Sprout Social, that I use for my own posts, my scheduled content, and my ads. Then I use Post Planner to fill out the rest of my stream with a scheduled feed of engaging content. I don’t schedule my own posts through it, nor do I try to stretch its functionality beyond what it comes with.
It’s up to you how you decide to work it in with your content plan. If you want to put heavier emphasis on using it as your manager, go right ahead. I don’t think that’s for me. On the other hand, I do think that Post Planner deserves more than the paltry reviews and guides it has online now, so that’s why I write this. It’s worth checking out, and since they have a free version, there’s no drawback to giving it a try.
