Written by ContentPowered.com
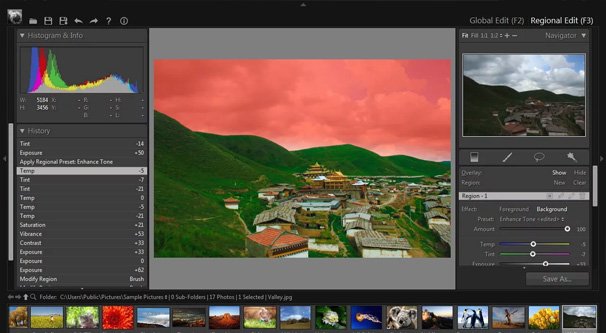
Have you ever posted on Instagram and then looked around, wondering why your pictures don’t seem to have the flair, the vibrancy of other images? Have you slapped a filter on to hide minor mistakes or to make up for what you feel just aren’t quite good enough photos? If so, what you’re probably missing is editing your images.
The biggest not-quite-secret about Instagram is that there is a TON of image editing going on behind the scenes. Most everyone does it, even if Instagram’s original purpose was to post unfiltered, “raw” images of daily life as a social network. None of those hugely successful models post a single thing that hasn’t been touched up, and you can bet every image from every brand is just about as divorced from reality as can be.
If you want to jump on the image manipulation train, you have a few ways to go about it. First of all, you have to decide: do you want to manipulate your images on a desktop computer before uploading them to a phone to be used on Instagram, or do you want to do your editing directly on the phone?
There are benefits to doing the desktop method. For one thing, desktop machines are much more powerful than mobile devices, meaning they can run more sophisticated software with many more powerful features. You can also make many more tweaks in more complex ways making heavy use of layers, predictive fills, and other tools that might bog down or crash an app on a mobile device.
On the other hand, using a desktop means you have more work to do. For one thing, you can’t upload directly to Instagram from a desktop device. You have to be using mobile to post on the social network, so you have to take a photo, put it on your desktop and edit it, then upload it back to your mobile device.
You can mitigate some of this process if you’re taking photos with a non-mobile device to begin with. Most high end cameras aren’t internet-enabled, so you have to download the photo anyway. You can also use cloud storage accessible on your phone, like Dropbox or Google’s whatever-Drive-is-called-now. You bypass part of the uploading process if you’re just saving your changes to the cloud where your phone can get them.
On the other hand, you’re tied to a desktop if you go that route. If you use a mobile editor, you can snap a picture, make it better, and upload it on the spot. You don’t need to go back to home base, you can take images that truly capture the moment. You also have a more tactile experience, which can be a benefit to some people, especially those who aren’t experienced with desktop graphics editing.
The primary downside to editing images via mobile is that touch interfaces, particularly on a small phone screen, are not well designed for fine detail work. Your finger is not as accurate as a stylus, and the kind of stylus that works on a phone – excluding the devices that specifically have their own pens – aren’t great for detail work.
Essentially, if you have a lot of fine details or touch-ups to do, or if you want to photo-edit multiple images together to make something new with more advanced tools than just a fade between them, you’re probably going to want to use a desktop device. If you’re fine with posting photos that just have some careful color correction and maybe a few edits, a phone-based app can work fine.
Speaking of, let’s talk about apps now. After all, that’s why you’re here. I’ve broken this up into three categories. The first is desktop apps; programs you’ll have to buy and install, or might have already installed depending on your system. The second is web apps; you might still need to make a purchase, but everything is handled by a cloud server rather than locally. The third are your mobile apps, for any photo editing you want to do on your mobile device directly.
Desktop Options
First on the list here is, of course, Photoshop. Photoshop is such a powerful program with so many features that, well, it leads the industry. There’s a reason photo manipulation these days is just straight-up called Photoshopping.
Photoshop is powerful and great, but it’s also quite complex and daunting to use. That said, there are a near-infinite number of tutorials available to learn how to do basically anything. The one major drawback of Photoshop in the past has been the cost, but even that is somewhat mitigated these days. It used to be you had to pay upwards of $300 or more for a copy of Photoshop. Now, it’s part of the Creative Cloud app suite, and you can get it for a mere $10 per month.
There’s also Adobe Lightroom as another option. It’s part of the same Creative Cloud and is more focused on photo editing rather than being a broad-spectrum art program. Which one you use is mostly down to preference in the workflows.
If you don’t want to support Adobe or you’ve had a bad experience with Photoshop in the past, you can use something like CyberLink PhotoDirector. PhotoDirector is a fairly good app with some useful features to spice up photos, like noise reduction and various filter effects. On the other hand, it has some shortcomings that could have been useful on Instagram, like a lack of geotagging support. It generally costs around $50, but can run as high as $100 if it’s not on sale anywhere.
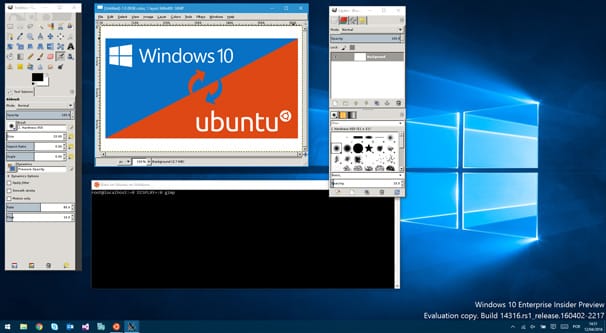
If you’re using Windows 10 as your primary desktop PC, you can use Microsoft Photos now that the creators update has hit. It’s installed by default as a photo viewer and editor, but it’s actually quite powerful under the hood. It’s fast and easy to use, allows you do some basic video editing for those Instagram Stories, and best of all, it’s free.
The equivalent for Apple die-hards is Apple Photos. Photos has been improved over the last few years and is pretty powerful itself these days. It’s intuitive, and it has advanced features some other apps lack, like face recognition and some auto-correction features. You can expand it with plugins as well. It, too, is free.
Of these, my recommendation is Photoshop. It’s simply too powerful and too useful to play second fiddle to anyone else. Once you get past the learning curve, you’re generally good to go, and the reasonable pricing these days removes the final hurdle.
Web Apps
If you’re willing to use a desktop to do your photo-editing, but you don’t want to have a program installed locally, you can always look into web apps. There are a few great options if you want to dig into them.
First up we have Pixlr. Pixlr is actually a suite of different apps. Pixlr Express is a pretty basic editor that mostly allows basic quick fixes to photos and filters added on top, but not a lot more. Pixlr O Matic is a similar app with a focus on some more goofy options, like crazy filters and retro effects. Pixlr Editor is their full offering, with support for all the major tools you would want to edit images, including layers and various special effects.
Pixlr’s major downside is that it’s Flash-based, and Flash is deprecated at this point. Within a few more years, they will either have to roll out an entirely new version or will be handily blocked by the majority of web browsers.
Another Flash-based option is Adobe’s Photoshop Express. Photoshop Express is the closest thing to Photoshop you’re going to get on a web app, and it’s free, but it lacks some of the more in-depth features and is still somewhat clunky to use if you’re not used to Photoshop already.
My recommendation for a web-based image editor is actually neither of the above; it’s Canva. Canva is a unique twist on an image editor in that it doesn’t necessarily require you to even have your own image. They have an extensive library of stock photos, effects, and elements that can be mixed, matched, and layered into images designed specifically for various uses. Uses range from ebook covers and infographics to Instagram posts, of course.
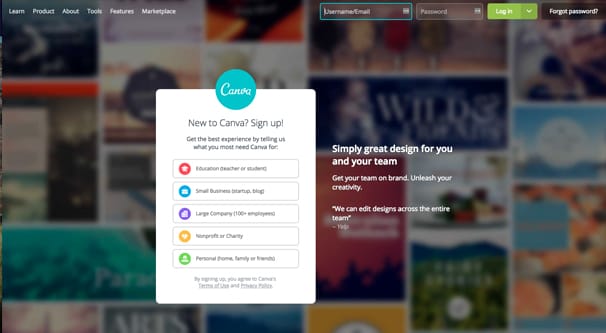
Canva is free to use, and stays free to use if you upload your own elements and photos. Access to the library is free as well, so you can see and play around with stock elements. You simply need to pay if you use any of those elements in the final version of the image you export. You also have access to that element for a while, so if you want to use it in multiple images, you’re only charged once. Overall, it’s a great system.
Mobile Options
If you’re interested in doing your editing on a mobile device, you’re in luck; there are a lot of options there too.
First of all, both Canva and Photoshop have mobile apps. Photoshop actually has several. Between them, I would recommend Canva, but there are still other options to consider as well.
Priime is an app made for iOS that will cost you about $3 to buy. I say “about” because it has in-app purchases that can beef up the cost if you go for them. All those purchases are is a series of filter packs, and something around $10 will get you all of them. Otherwise, it’s a decent if limited photo editor, primarily thriving off their variety of filters.
Snapseed is a photo editing app created by Google, and it’s considered one of the more powerful options available. It’s available for both iOS and Android, and it’s free on both. Rather than giving you traditional Photoshop-esque tools, it gives you specific functions you can use on your images. These include tools for adjusting color temperature, exposure, or a healing tool to remove blemishes using surrounding context. It has a bunch of filters as well, all with their own fine-tuning options.
Darkroom is one of the more popular iOS photo editors out there. It’s fairly simple, relying mostly on filters with some pre-sets rather than editing tools. You’re mostly just limited to crops and the basic brightness/contrast/sharpness tools almost every app includes. The main reason it’s useful is that you can adjust a filter just the way you like it, then save the settings to be applied again in the future. You can make custom “brand” filters and use them repeatedly.
Litely – also for iOS – is an interesting offering. On its own, it’s not very good and doesn’t do much. However, it uses the iOS photo editing extensions, which means you can use it directly inside the iOS photos app. The convenience might make up for the lack of features, depending on how heavily you want to rely on image editing for your photos.
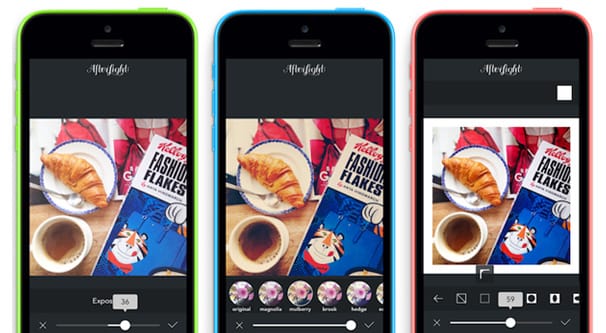
Photo Editor by Aviary is available for both iOS and Android, and it’s also quite good. It has a whole range of editing options, including exposure, shadows, highlights, saturation, and other filters and overlays. You can add text, crop and even draw directly on your photos with a pen tool.
Overall, apps generally aren’t going to be worthwhile if you have advanced editing needs. The Canva or Photoshop apps might fit the bill, but it’s better to just use a desktop program. If all you want are special or custom filters, overlays, and text, though, basically any app is going to work. So rather than me telling you, you tell me; what’s your favorite app-based photo editor?