 Written by ContentPowered.com
Facebook hasn’t gotten where it is today by being a half-assed platform, and you won’t get anywhere on it by being a half-assed marketer. Learn the ins and outs of the platform so you can maximize your ad revenue, grow your page quickly, and watch your conversions explode.
Ad Types
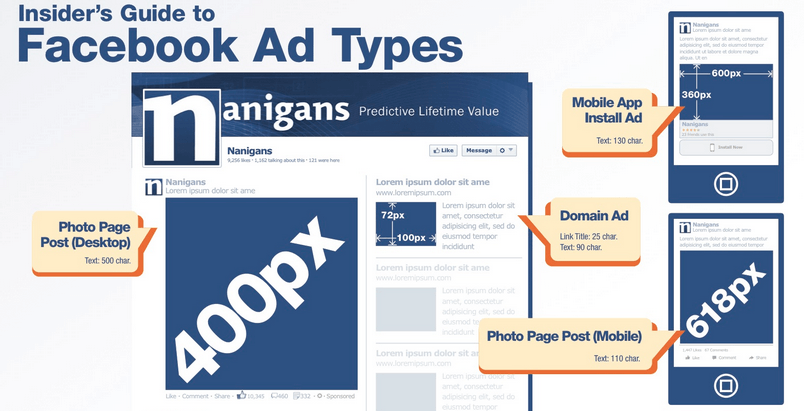
Ads on Facebook show up in two different locations; the sidebar and the news feed. Sidebar ads are the most like traditional ads. They have an image, a headline, copy, and a link. There are no limits on text on the image, but there are limits on the grammar and formatting of your copy. News feed ads have limits on the text you can have on the image. They can also include videos for specialized video ads.
The same differences appear on mobile, between feed ads and mobile app ads. Mobile app ads are either within apps, or in the news feed asking you to install apps. Get to know which types work for your audience, specifically between the mobile-desktop divide.
Ad Objectives
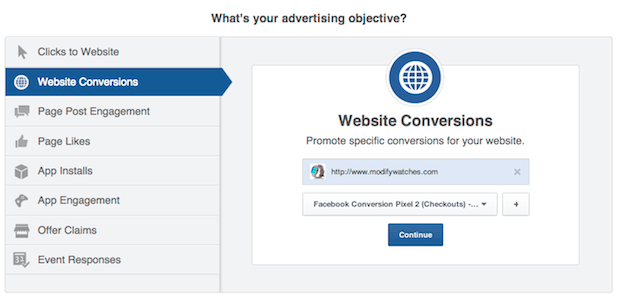
There are also a number of different objectives you can choose for your ads, regardless of where those ads are displayed. Always be mindful to pick the right objective for your ads. If you want a link to your Facebook page, don’t use the website link ad, use the page likes ad. You’ll only pay when people actually perform the objective, so it’s better to not waste money.
The most common types of ad are the post engagement ad, the page likes ad, the website clicks and website conversions ads, and the app installs ads. The other types are much more specialized and, while they work when you use them for their purpose, they’re less generally useful.
Targeting Options
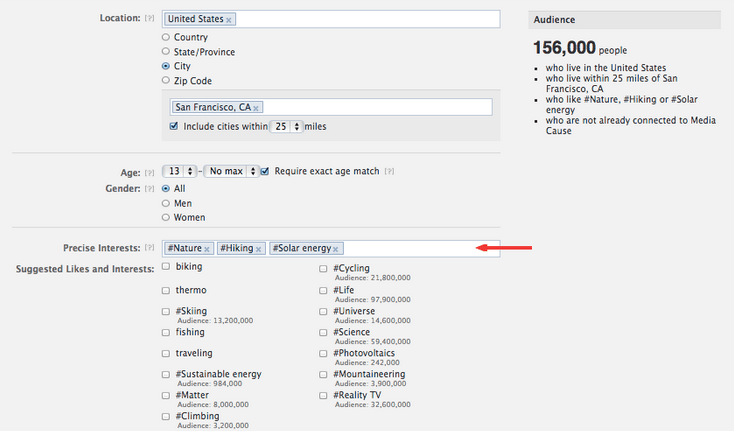
There’s so much to learn about targeting options on Facebook that we have written not once but twice on the subject. Read this post to learn about targeting in general, and this one to read specifically about the geolocal targeting options.
There’s also the entire concept of custom audiences to learn about. Custom audiences are specialized groups of people you can use as targets, based on various factors. You could create an audiences made up of everyone who matches the demographics of the people who follow you, but who don’t already follow you. You can make one based on people who are friends of the people who follow you. You can make them based on email lists or general demographics, as well.
An Example Guide
Learning theory is all well and good, but until you put it into practice, you never know how much you don’t know. Here’s a sample start-to-finish ad creation tutorial, which you can follow to create a basic ad.
Before you begin, you need to have a Facebook page with at least some audience built up. You need this as a resource to use for future steps, as well as to make your ad effective. If you don’t have an active page, no one who sees your ad and clicks through is going to want to stick around.
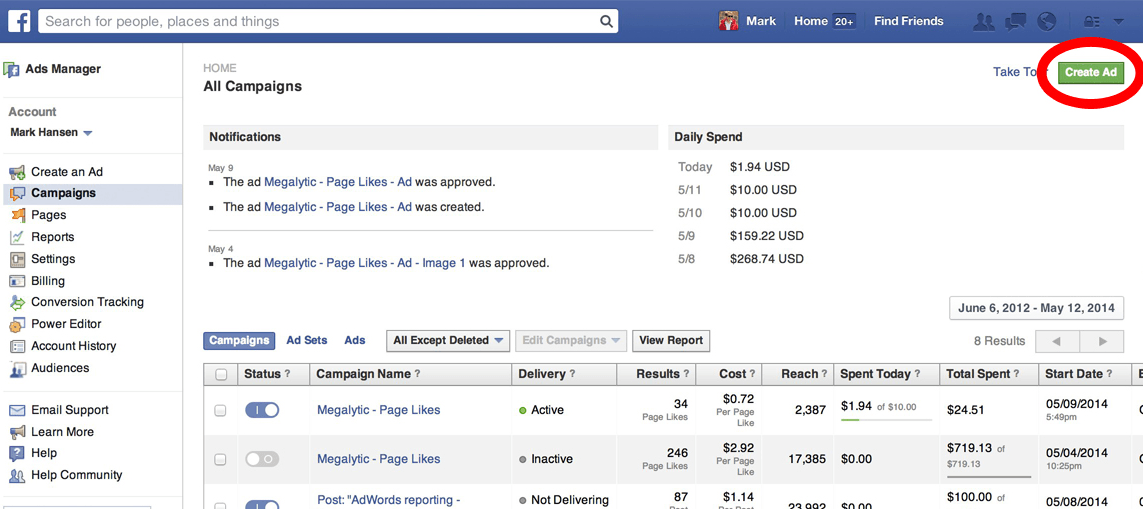
First, you’re going to create a custom audience. To do this, go to the Ads Manager and click through to the Power Editor. This tool is near essential for running a Facebook ad campaign, and even though it’s a little daunting, you need to learn it. In the Power Editor, click the Audiences section, click to create an audience and select Custom Audience.
Here you can create an audience based on your website, your mobile app, a MailChip audience or a data file. The easiest to use is a data file, which you can get as an exported list of Facebook IDs or an email mailing list. Assuming you don’t use MailChimp, export your mailing list as a CSV and upload it here.
You can run an ad with just this audience, but you might also want to create a lookalike audience. This custom audience searches Facebook for people who look, demographically, like the people in the list you uploaded. This effectively multiplies your list with people who are very likely to be interested in your page.
To create an ad, first you need to create a Campaign. To do this, just click the Campaigns button and click to create a new campaign. Here, we’re going to assume you want to get your email subscribers and people like them to like your page. To do that, click the “Page Likes” objective for your campaign and set the buying type as Auction. Name the campaign whatever you would like, so long as it’s descriptive and memorable.
Within the campaign, you will need to create an ad set. Think of an ad set as the base from which all split-test ads are derived. If you’re creating a new base, you create a new ad set. If you want a different objective, you create a new campaign. Make sense?
Create the ad set and give it a name. Here, you’ll want to create two ad sets. The first should be something like “Email Audience” and the second can be “Lookalike Audience.” Set your budget and the date range for your ad to run. For maximum split-testability, set the same information for each set.
Within each ad set, you need to create your ads. Click to create an ad and specify which campaign and ad set it’s part of. Then follow the directions. You’ll want to set up your creative as well as you can, with a compelling image, good copy, etc. A lot goes into this, and it’s too much to cover here.
Under the audience tab, specify which audience you’re going for. Exclude people who are already fans, as they already like your page and won’t be able to convert. Optimize your pricing.
You can repeat and adjust the creative of each ad, and you can use a created ad as a template for a future ad, so be sure to make as many variations as you want to test. Just be sure you watch them in Insights in order to figure out which works best and focus on that given ad.
Once your ads are created, you’re free to set them loose. Facebook will review them and make sure they don’t violate any guidelines. Once approved, they’re free to be viewed and clicked by anyone in your audience.